Git and Arma Reforger
If you are creating a mission and have not used Git, start here to keep a history of your project changes.
Git keeps a history of changes to your project. If an edit breaks the mission, you can review what changed and undo the faulty edit. GitHub stores a copy of the repository online; GitHub Desktop lets you work with it using windows and buttons.
This guide uses a practice addon called Triad Desert Storm. The same steps work for your own mission. Install GitHub Desktop and sign in to your GitHub account. You also need Arma Reforger and Arma Reforger Tools to create the addon.
Create a repository
Section titled “Create a repository”A repository is a project folder together with its change history. In GitHub Desktop, choose File → New repository.
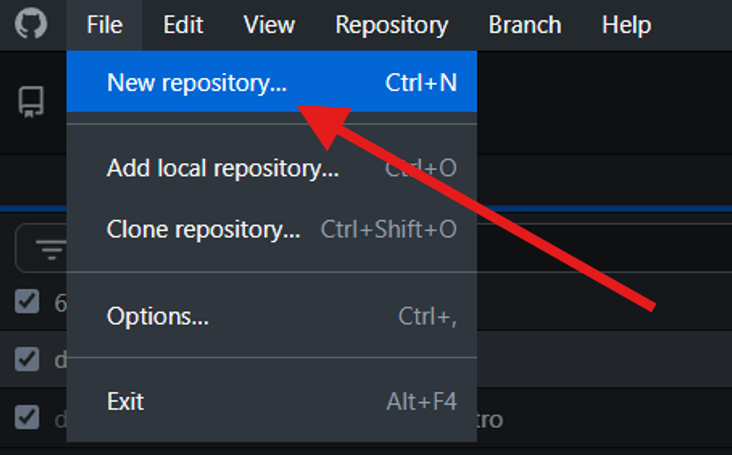
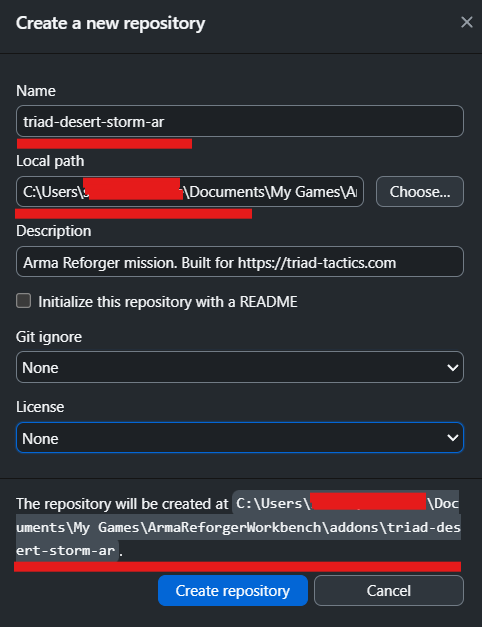
Enter triad-desert-storm-ar in Name. Use lowercase Latin letters and separate words with hyphens:
triadidentifies a Triad Tactics project;desert-stormis the mission name;arstands for Arma Reforger.
For a mission outside Triad Tactics, you could use desert-storm-ar or silent-port-ar. Consistent names make missions easier to find and identify the game they belong to. This is the naming convention used in our projects.
For Local path, choose the parent folder:
Documents\My Games\ArmaReforgerWorkbench\addonsGitHub Desktop creates the triad-desert-storm-ar folder inside it. Check the full path at the bottom of the window. You can add a short mission description in Description. Leave the remaining options as shown for now, then click Create repository.
Create the addon inside the repository
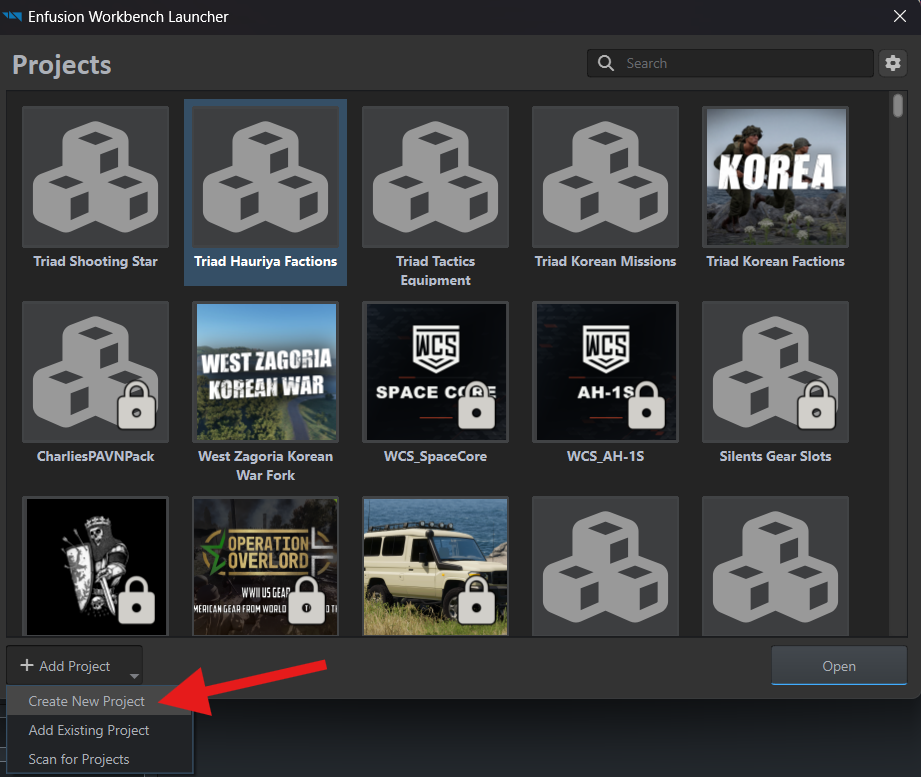
Section titled “Create the addon inside the repository”Launch Arma Reforger Tools. In the launcher, choose Add Project → Create New Project.
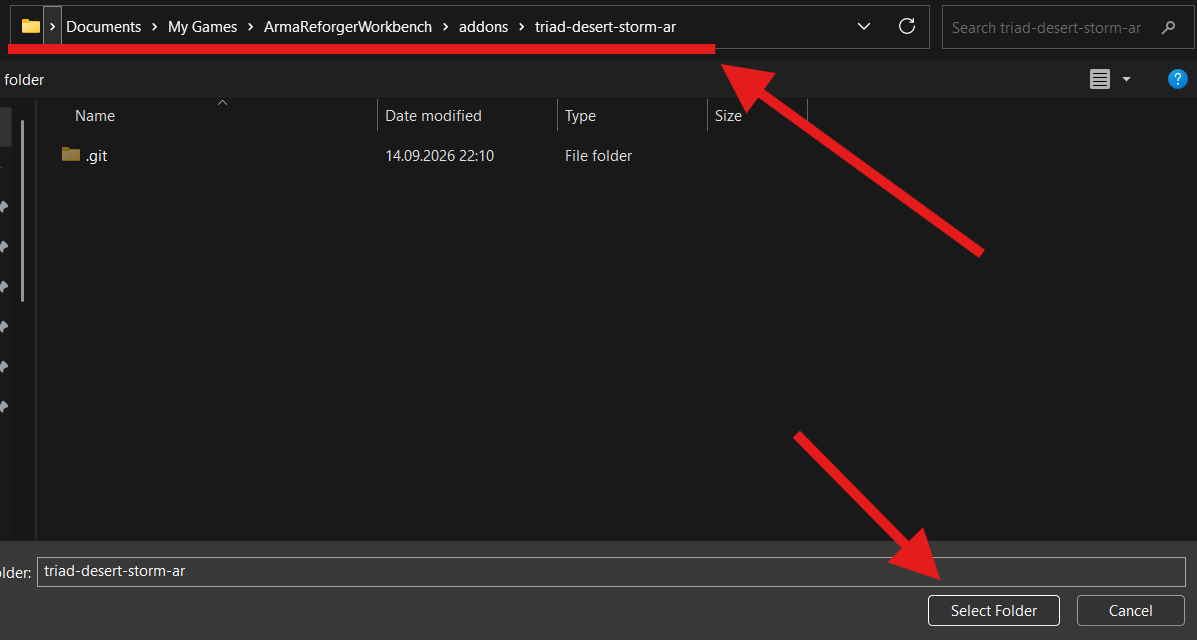
Enter Triad Desert Storm in Project Name. Click the folder button beside Location, select the triad-desert-storm-ar folder you created, then click Select Folder.
Check the name and path, then click Create. Workbench creates the addon folder Triad Desert Storm inside the repository.
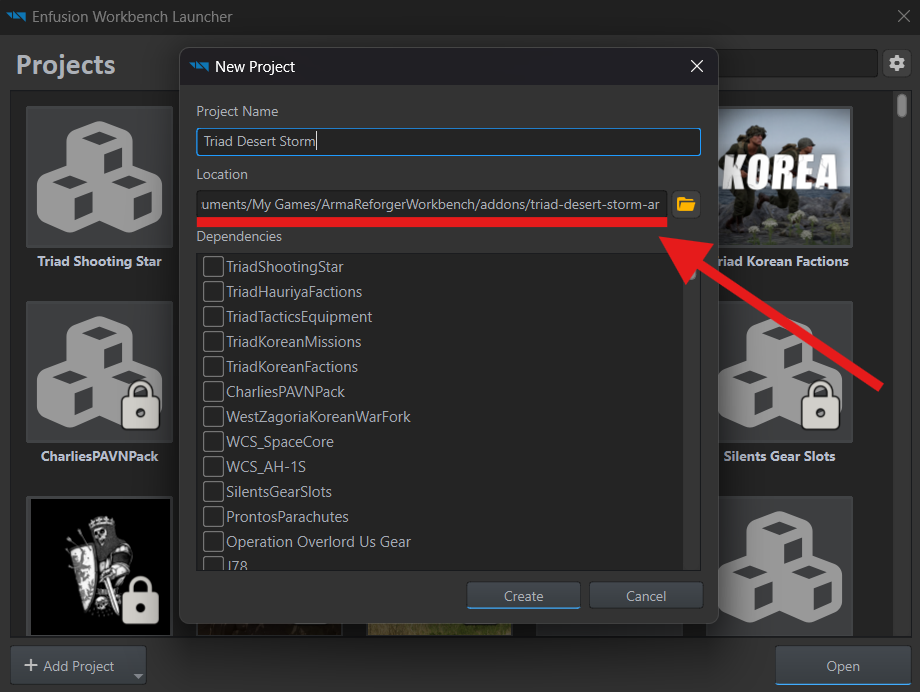
The folder structure will be:
triad-desert-storm-ar/├── .git/└── Triad Desert Storm/ └── addon.gprojThe .git folder stores the repository history. Mission files belong in the addon folder beside addon.gproj and in its subfolders.
Further setup is covered in How to create a mission. Here we will continue with Git. The following screenshots already include a world called DemoWorld; the files of the new project are enough for your first commit. You can add the world later.
Your first commit
Section titled “Your first commit”A commit records selected changes in the project history. Save your files in Workbench, then open the repository in GitHub Desktop. New and modified files appear in Changes.
Ignore the resource database
Section titled “Ignore the resource database”resourceDatabase.rdb is Workbench’s resource database. It does not need to be stored in Git. Right-click the file and choose Ignore file (add to .gitignore).
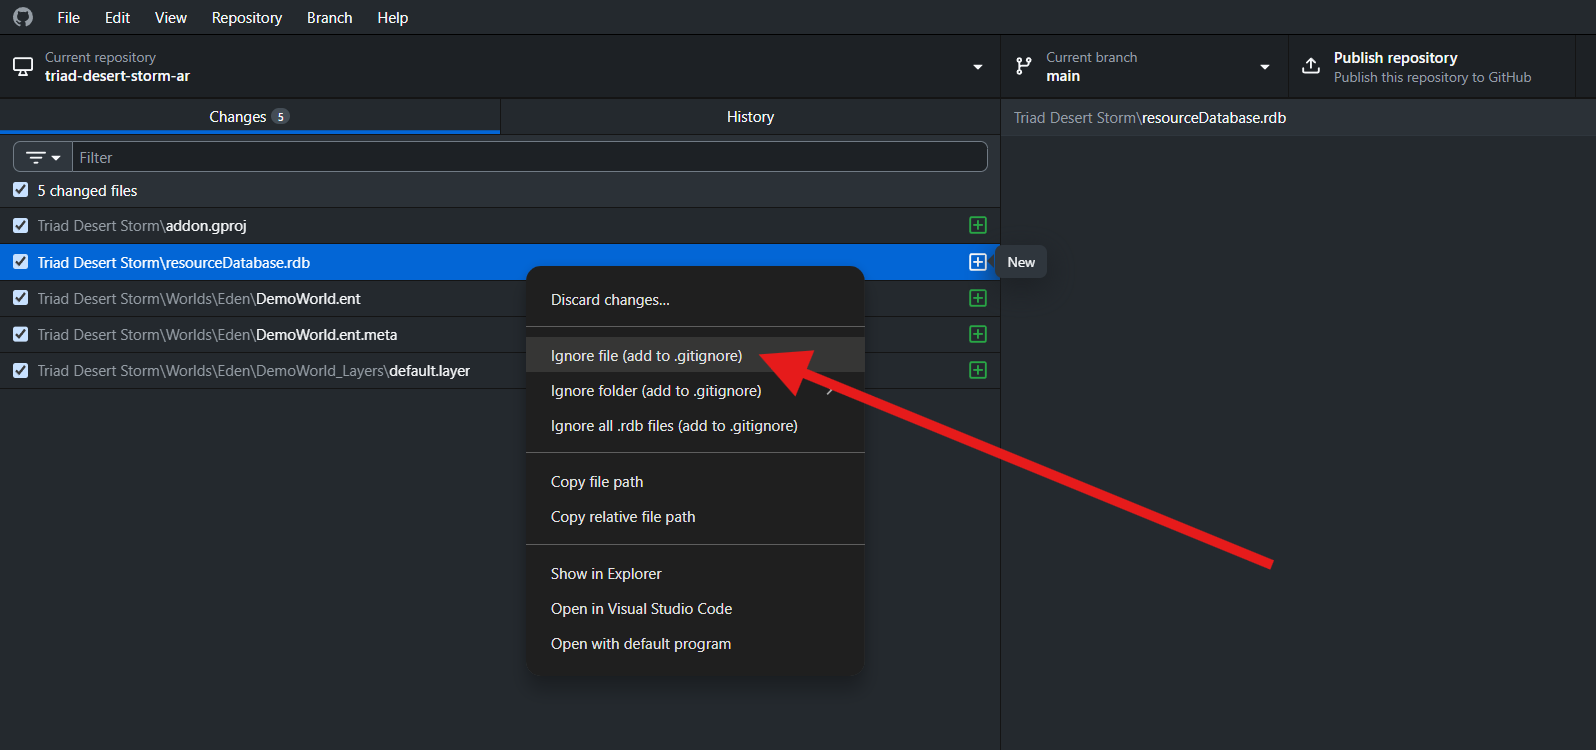
GitHub Desktop creates a .gitignore file with a rule for this path. Include .gitignore in the commit so the rule stays with the project. Ignored files remain on your computer. The rule applies to files that have not already been added to Git history.
Keep addon.gproj, worlds, layers, prefabs, and their .meta files in the repository. The .meta files contain resource data, including identifiers; do not exclude all files with this extension.
Record the changes
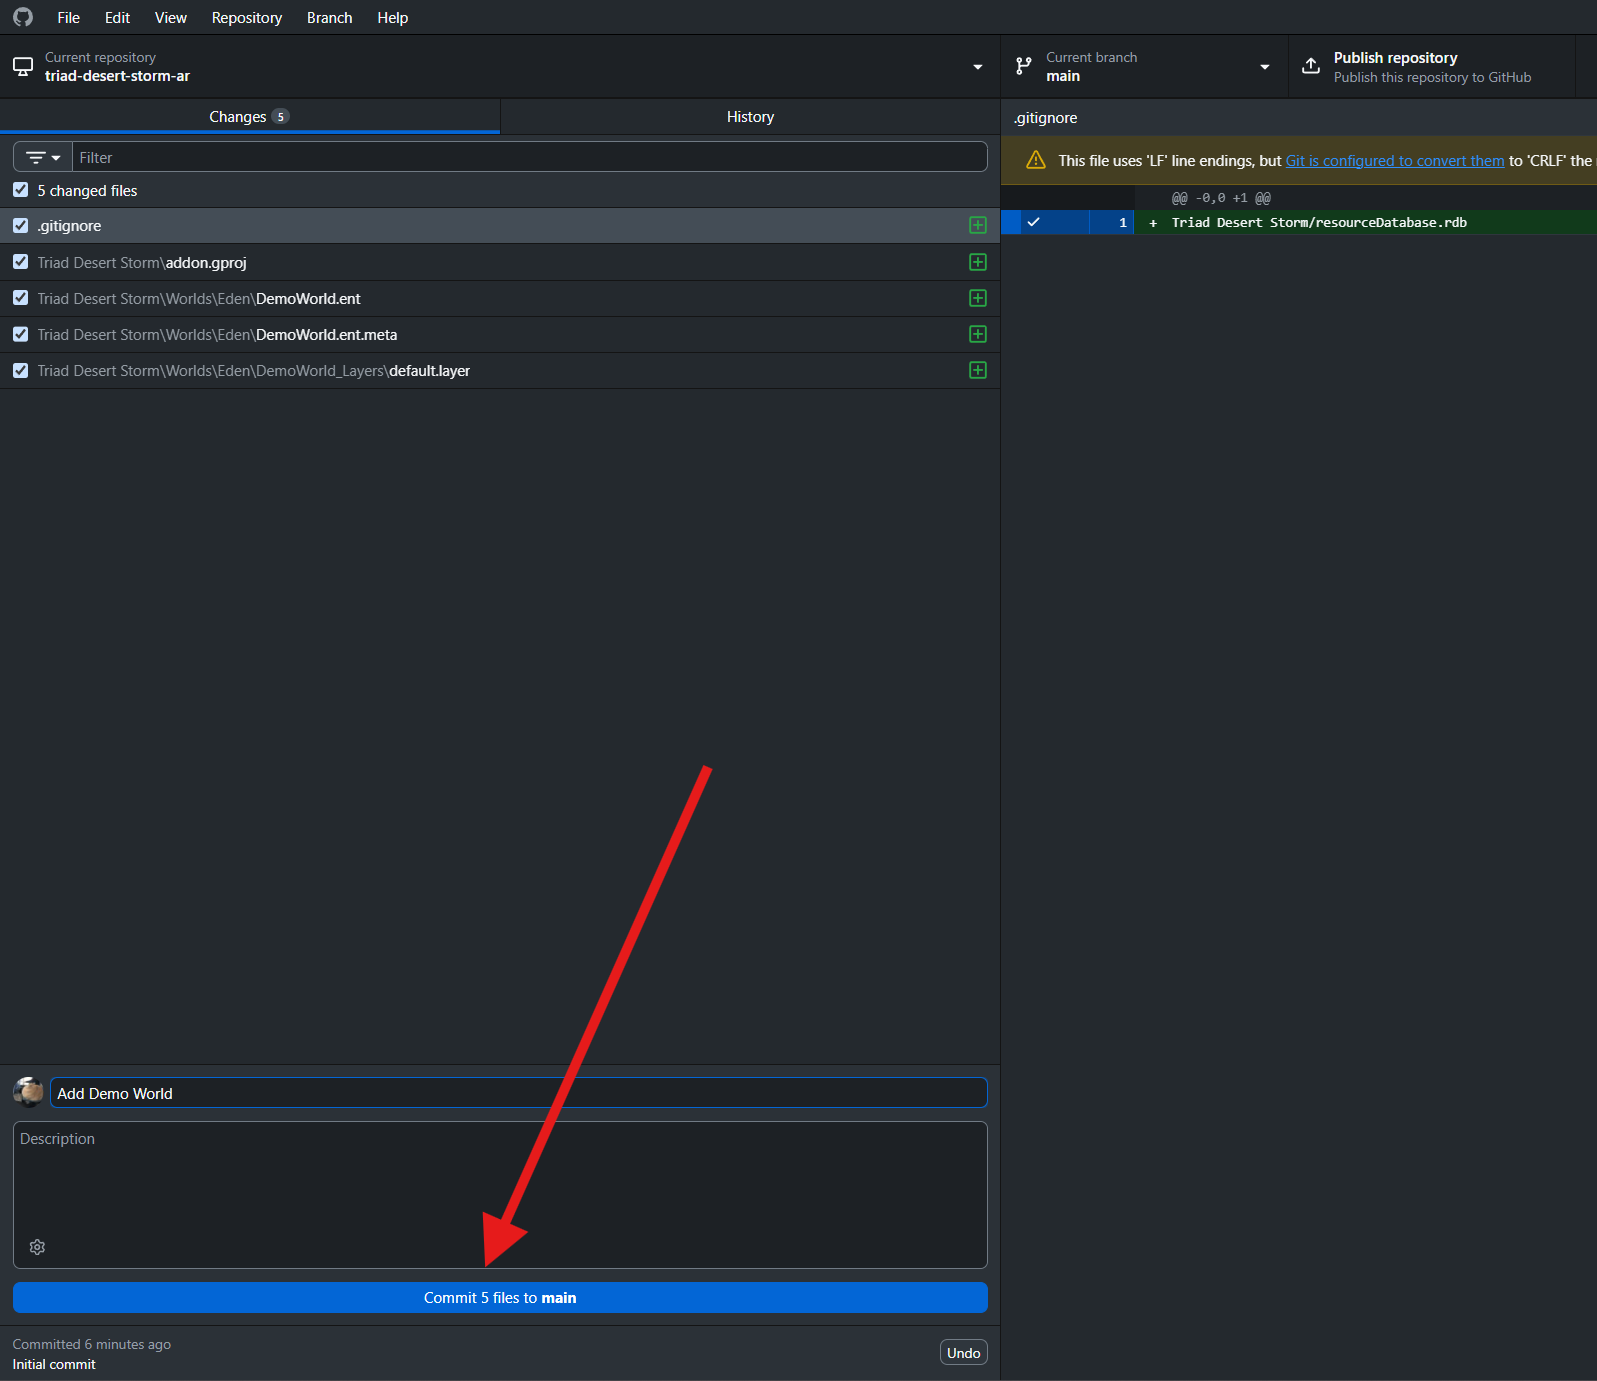
Section titled “Record the changes”- Review Changes. Select a file to inspect its changes on the right. Checked files will be included in the commit.
- Describe the result briefly in Summary. The screenshot uses
Add Demo World. If you have only created the addon,Create mission projectis suitable. - Click Commit … files to main. The file count depends on your project;
mainis the current branch, where this history is recorded.
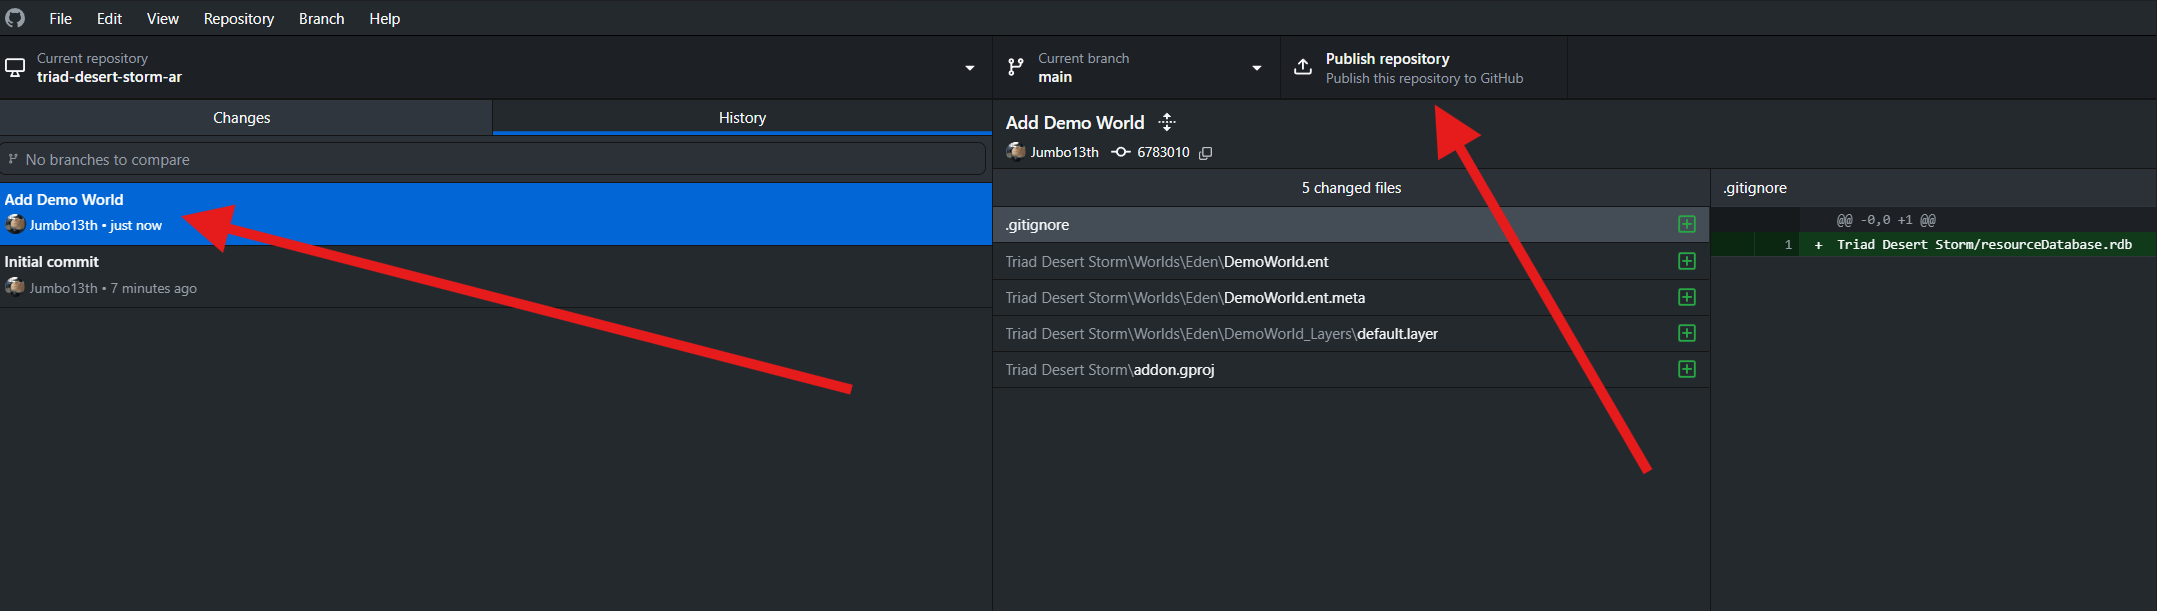
Your commit appears in History. It is still stored only on your computer.
Commit messages
Section titled “Commit messages”Say what changed. Messages such as update, fix, or done tell someone reviewing the history a week later very little.
| Change | Example message |
|---|---|
| Added the mission world | Add mission world |
| Fixed the radio operator’s radio | Fix radio operator equipment |
| Configured port capture | Configure port capture |
You can also use your team’s language. Choose one language for the project. Use Description to explain why you made the change when the title does not make that clear; leave it empty for a simple edit.
Publish the repository on GitHub
Section titled “Publish the repository on GitHub”Click Publish repository at the top of the window.
Check Name and Description. Keep this code private controls access: checked means private; unchecked lets other people view the files and history. The screenshot selects a public repository. Leave Organization → None to publish under your own account, then click Publish repository.
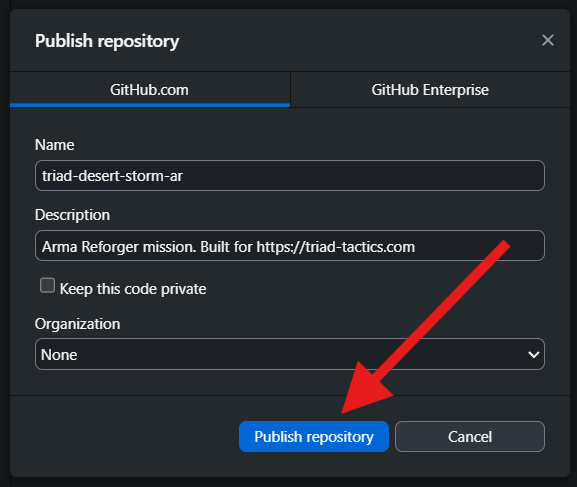
Open Repository → View on GitHub and check that the files are on the website.
Save your ongoing work
Section titled “Save your ongoing work”After each small step, repeat these three actions:
- Save files in Workbench. Git can only see changes written to disk.
- Commit in GitHub Desktop. Review the files and write a clear message.
- Click Push origin. This sends the commits to your repository on GitHub.
If you work on several computers or with other authors, click Fetch origin before starting to check for changes on GitHub. If Pull origin appears, download those changes before editing the mission. Commit your own work and close Workbench before pulling, then reopen the project.
Revert a faulty commit
Section titled “Revert a faulty commit”If an error appeared after a particular commit, you can reverse that commit’s changes. Git records the reversal in a new commit and keeps the original in the history.
Commit your current changes separately and close Workbench. In History, select the faulty commit and review its changes. Right-click the commit and choose Revert changes in commit.
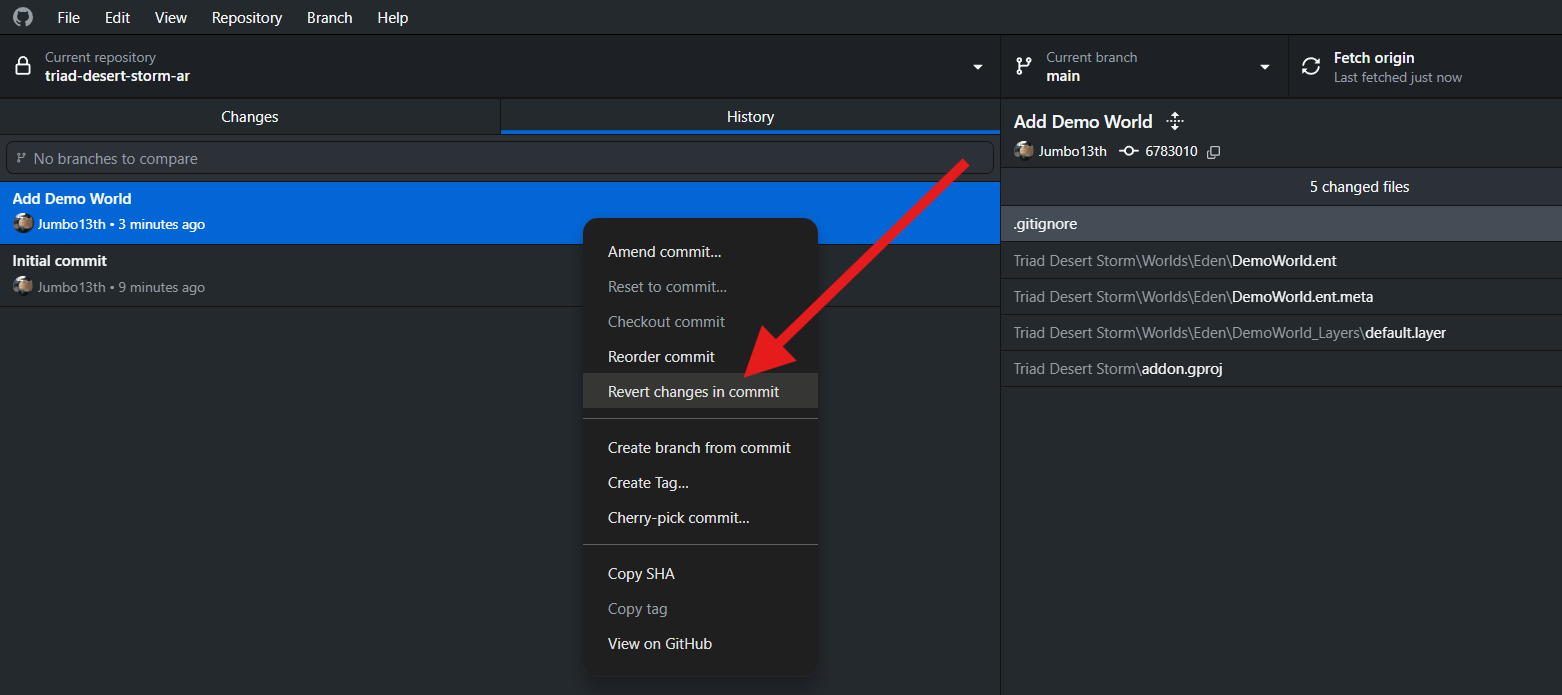
A Revert "…" commit appears in the history. Check the result in Workbench, then click Push origin to send the reversal to GitHub.
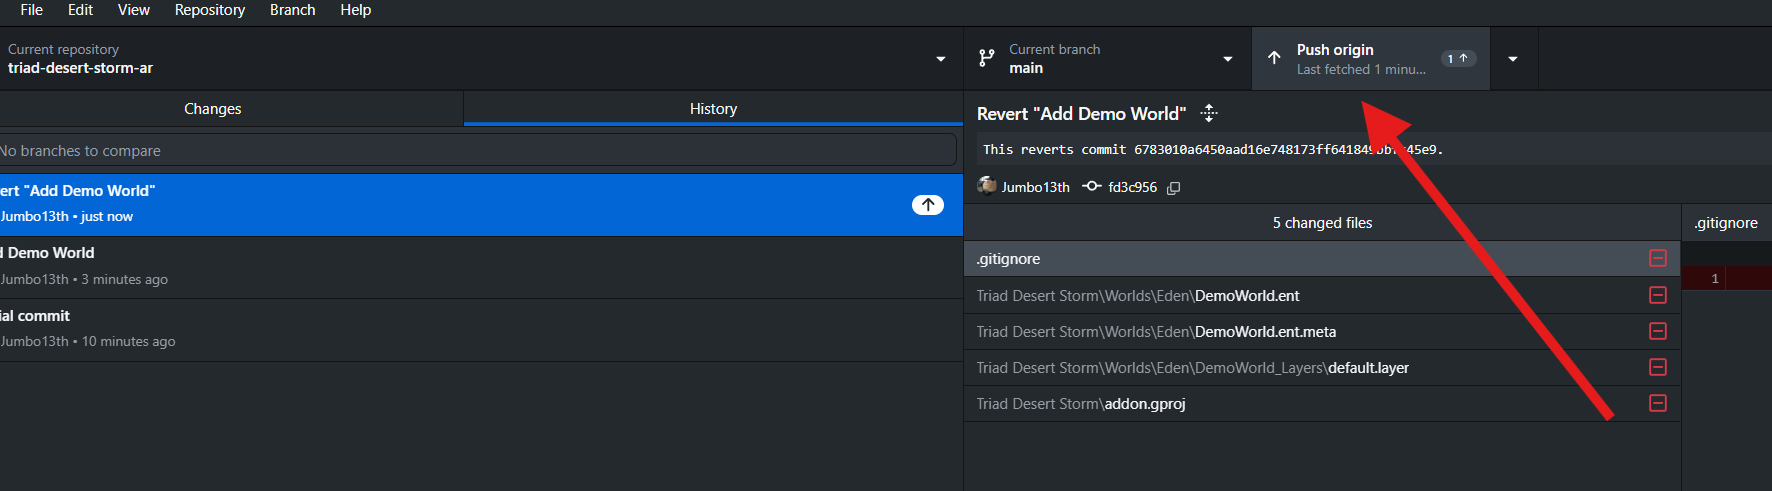
This reverses the selected commit, not every action after it. If you later changed the same lines, a conflict may occur: Git will ask which version to keep. Read the error message before proceeding.
Get help from AI
Section titled “Get help from AI”If you get stuck with Git, give an AI assistant a link to this guide and a screenshot of GitHub Desktop or the full error message. Explain what you wanted to do and which changes you need to keep.
For example: “I want to undo the radio edit but keep the group I added afterward. Here is the commit history. Explain which commit to select and what reverting it will change.”
A coding agent can inspect the files and repository history, help resolve a conflict, or suggest a commit message based on the changes. Ask it to explain the steps and their effects first. Before deleting files or changing history, check that the work you need is saved.
Example repository
Section titled “Example repository”The Triad Shooting Star repository follows the conventions described here. Use it as a reference: look at its name, folder structure, and .gitignore, then compare them with your project.
To explore the mission in Workbench, follow Open an existing mission.
You can now continue creating your mission.