4. Weapons and character variants
The base prefab already contains the uniform and personal items. For the ODA, the Green Beret detachment in our mission, prepare a child with armor, webbing, weapons, and ammunition. Once that shared loadout is complete, create the sergeant and commander with their additional equipment.
The unit’s shared combat loadout
Section titled “The unit’s shared combat loadout”Later changes to a parent prefab also pass to its children, except for settings changed in a child itself. That is why we keep shared settings and individual equipment in separate prefabs. See the reference on inheritance, duplicates, and overrides for more detail.
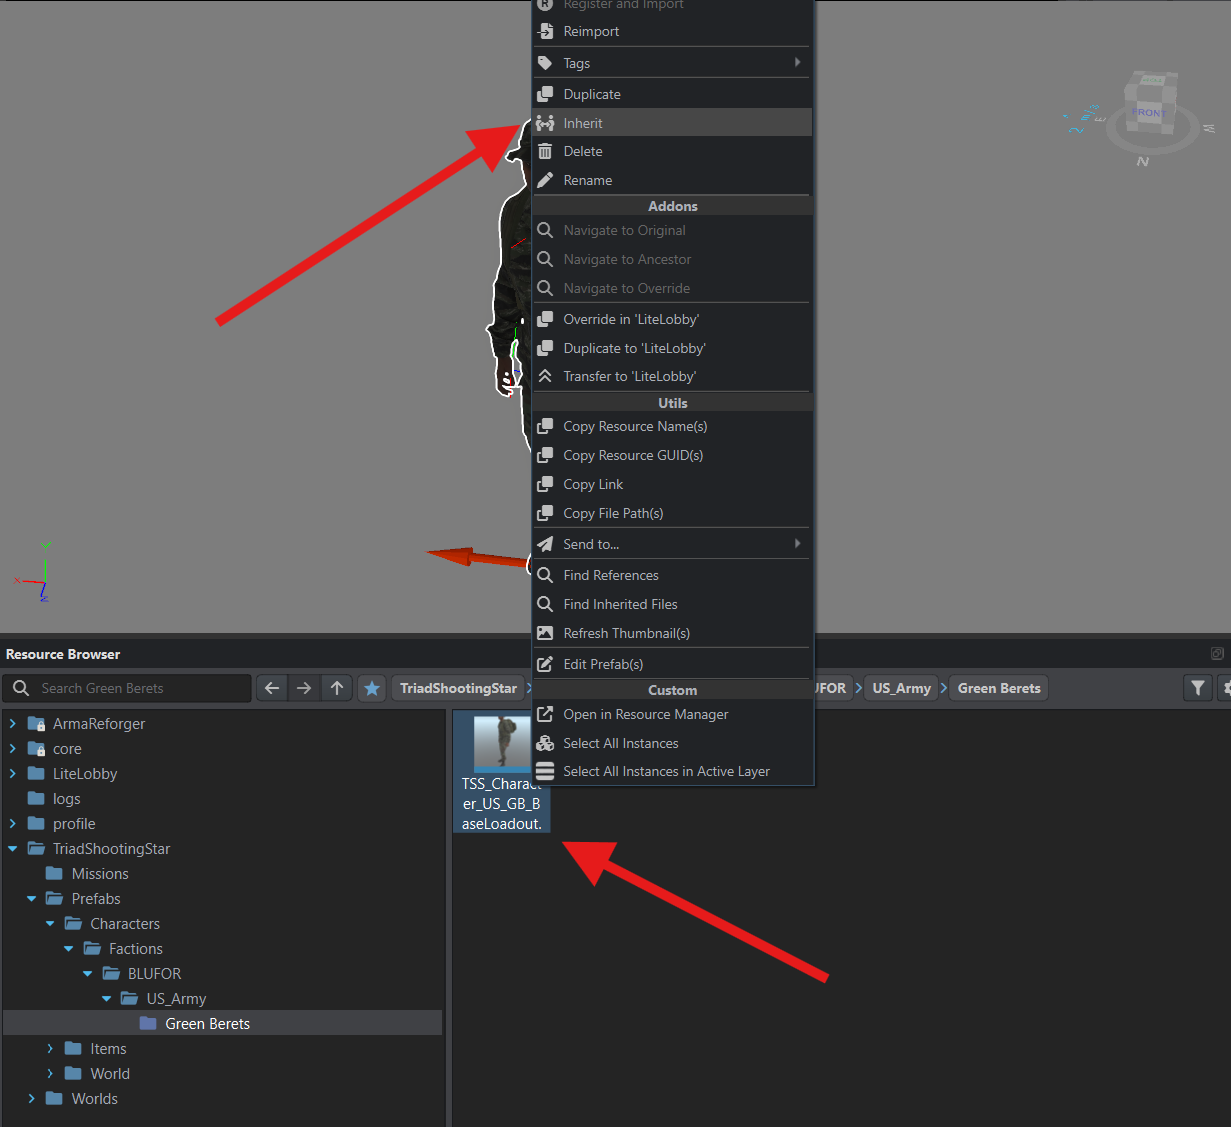
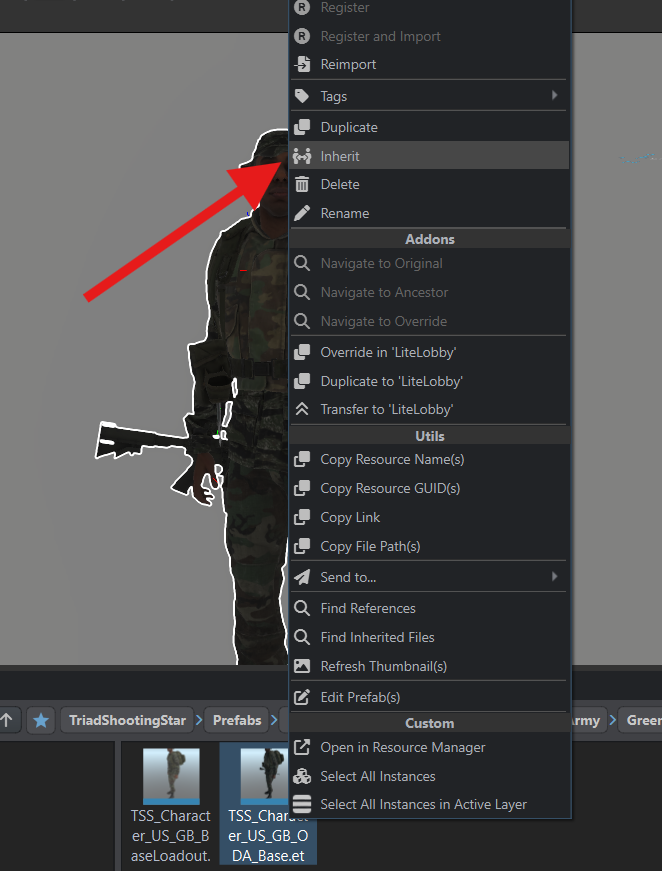
In Resource Browser, open your addon’s Green Berets folder. Right-click TSS_Character_US_GB_BaseLoadout.et and select Inherit.
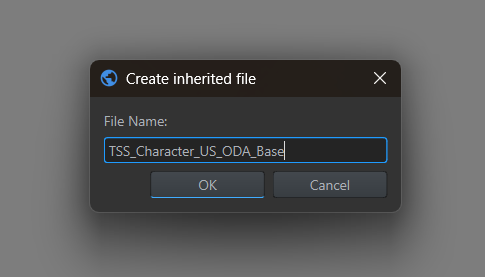
Enter TSS_Character_US_GB_ODA_Base in File Name and click OK. The screenshots show an older name without GB; this guide uses the name from the current example mission.
Armor and webbing
Section titled “Armor and webbing”Open the new TSS_Character_US_GB_ODA_Base.et through Edit Prefab, select the character, and find BaseLoadoutManagerComponent by searching for load.
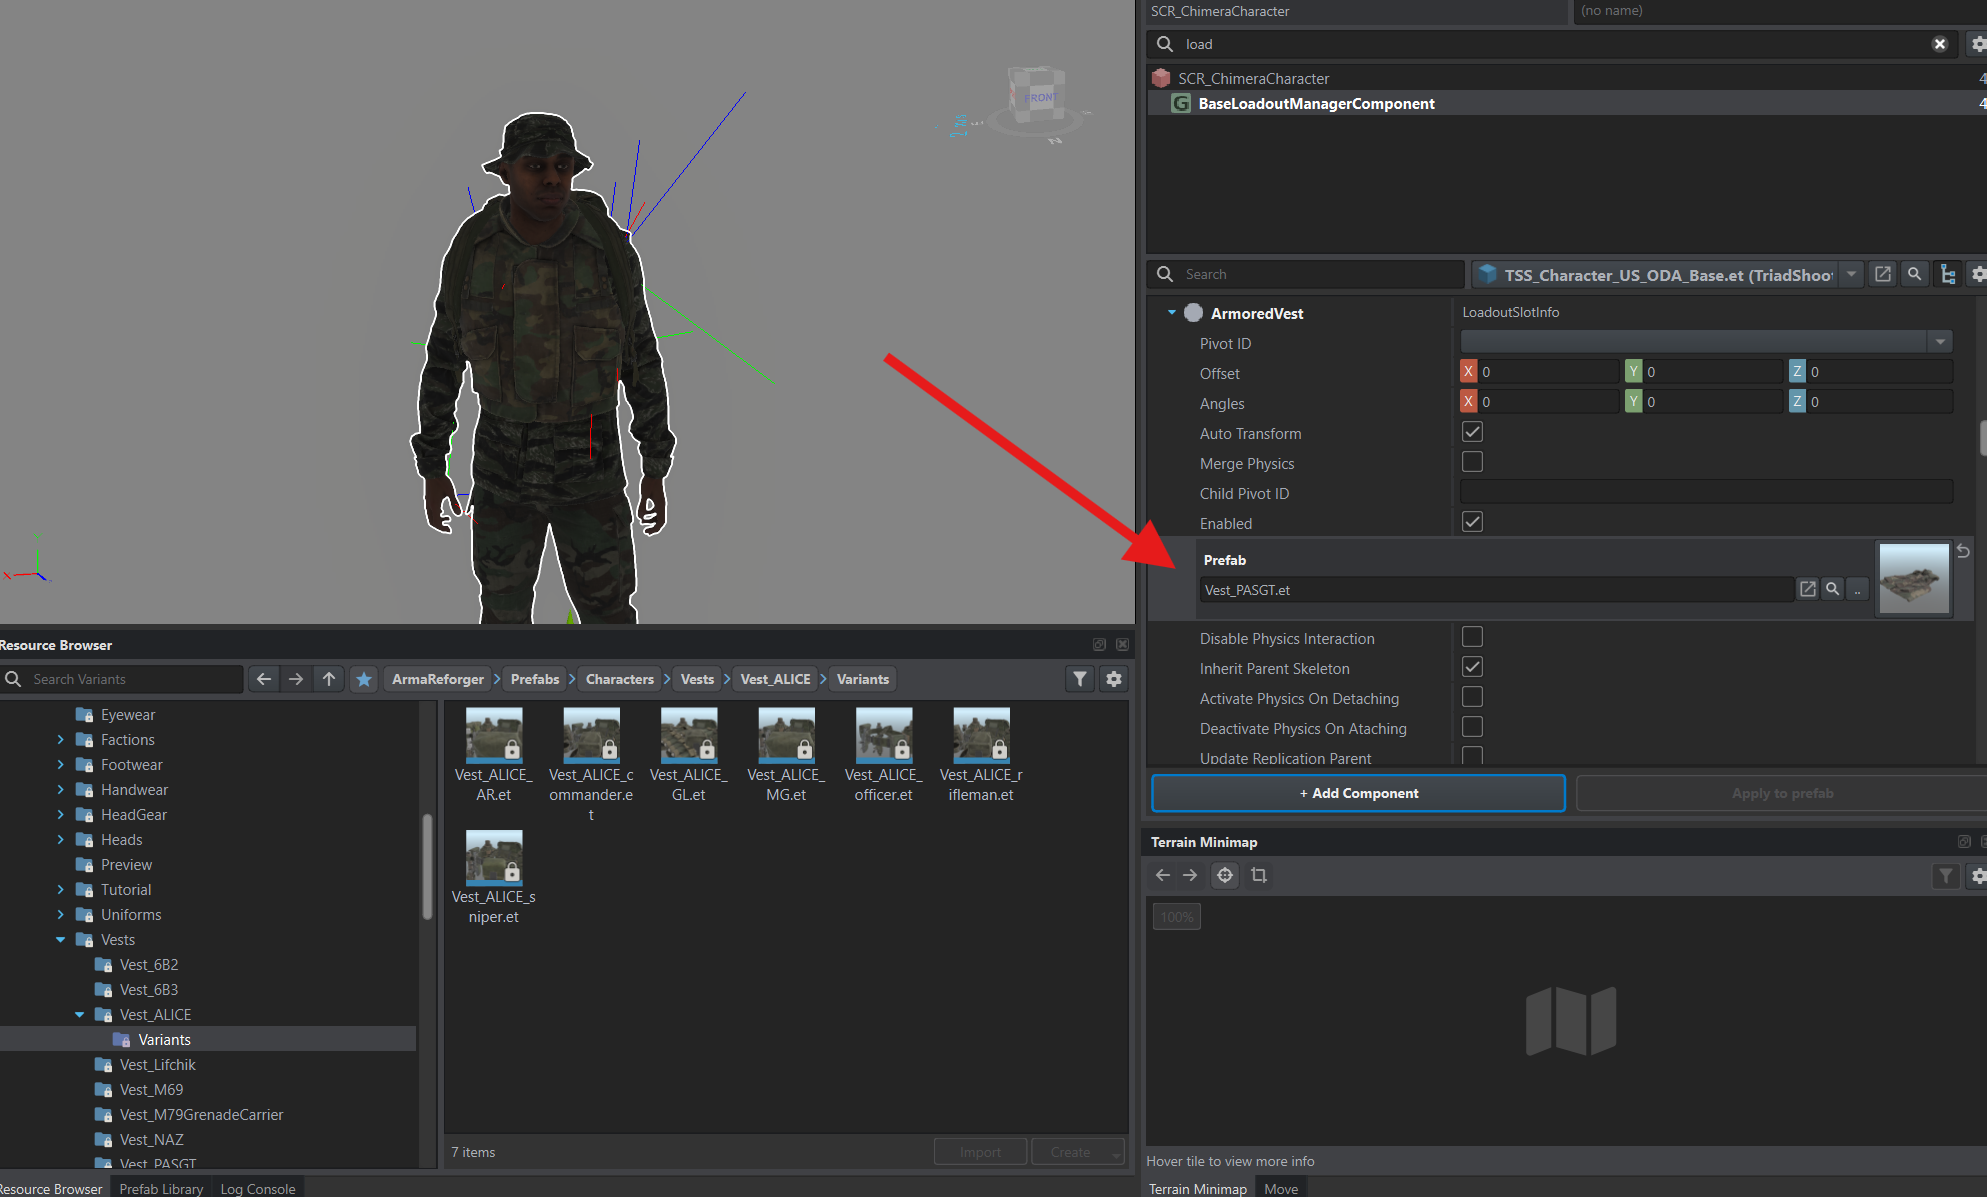
Under Slots, expand ArmoredVest, the body armor slot. In ArmaReforger, open Prefabs/Characters/Vests/Vest_PASGT and drag Vest_PASGT.et into Prefab.
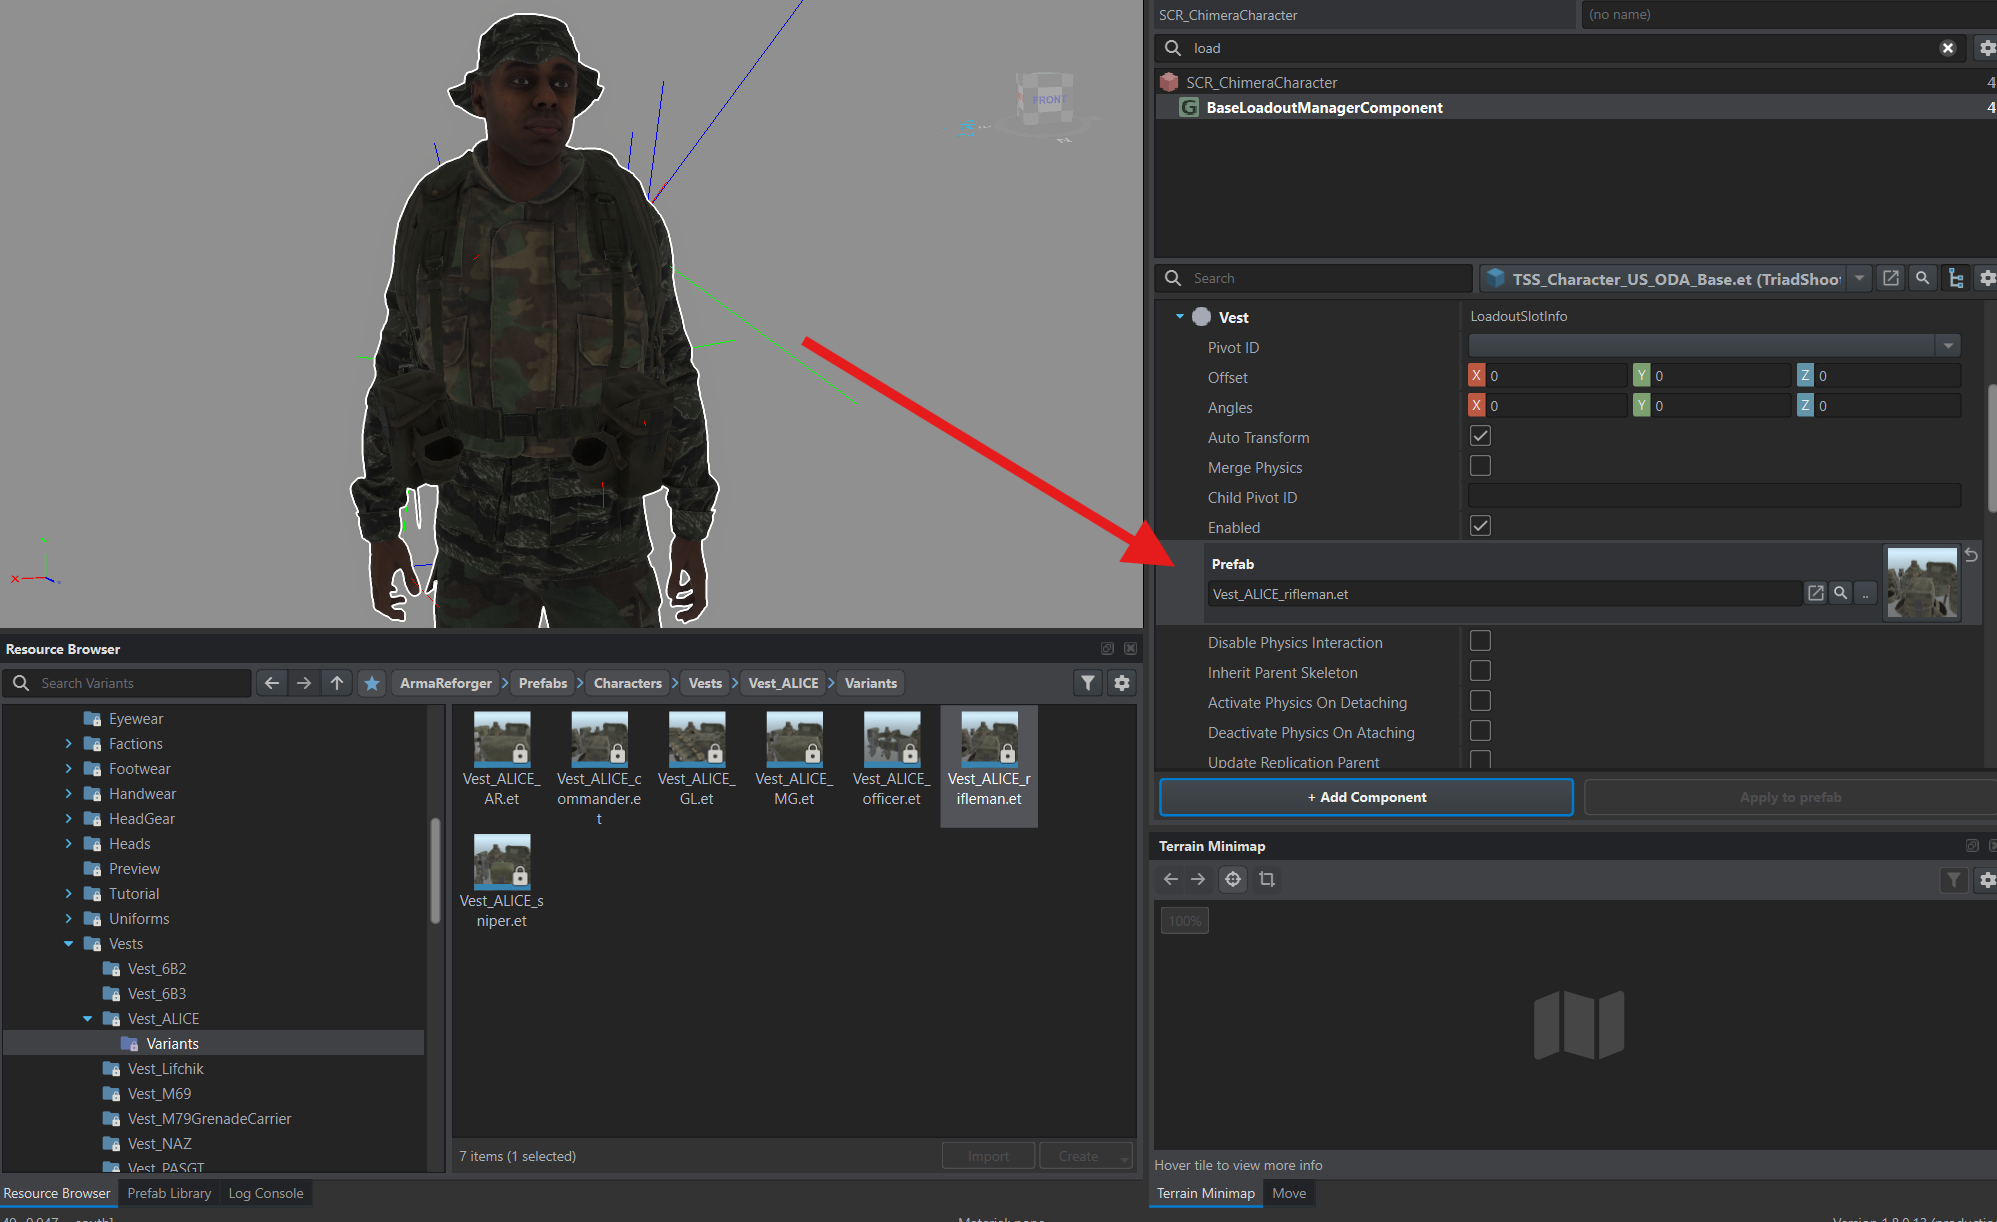
Next, expand Vest, the slot for webbing with pouches for magazines and other items. Find Vest_ALICE_rifleman.et in Prefabs/Characters/Vests/Vest_ALICE/Variants and drag it into this slot’s Prefab field.
Primary weapon
Section titled “Primary weapon”Type weap in the component search. Several CharacterWeaponSlotComponent entries will appear, representing weapon slots. Select the one with Weapon Slot Type set to primary and Weapon Slot Index set to 0.
In ArmaReforger, open Prefabs/Weapons/Rifles/M16/Variants. Drag Rifle_M16A2_carbine_OliveGreen_Solid.et into the selected component’s Weapon Template field.
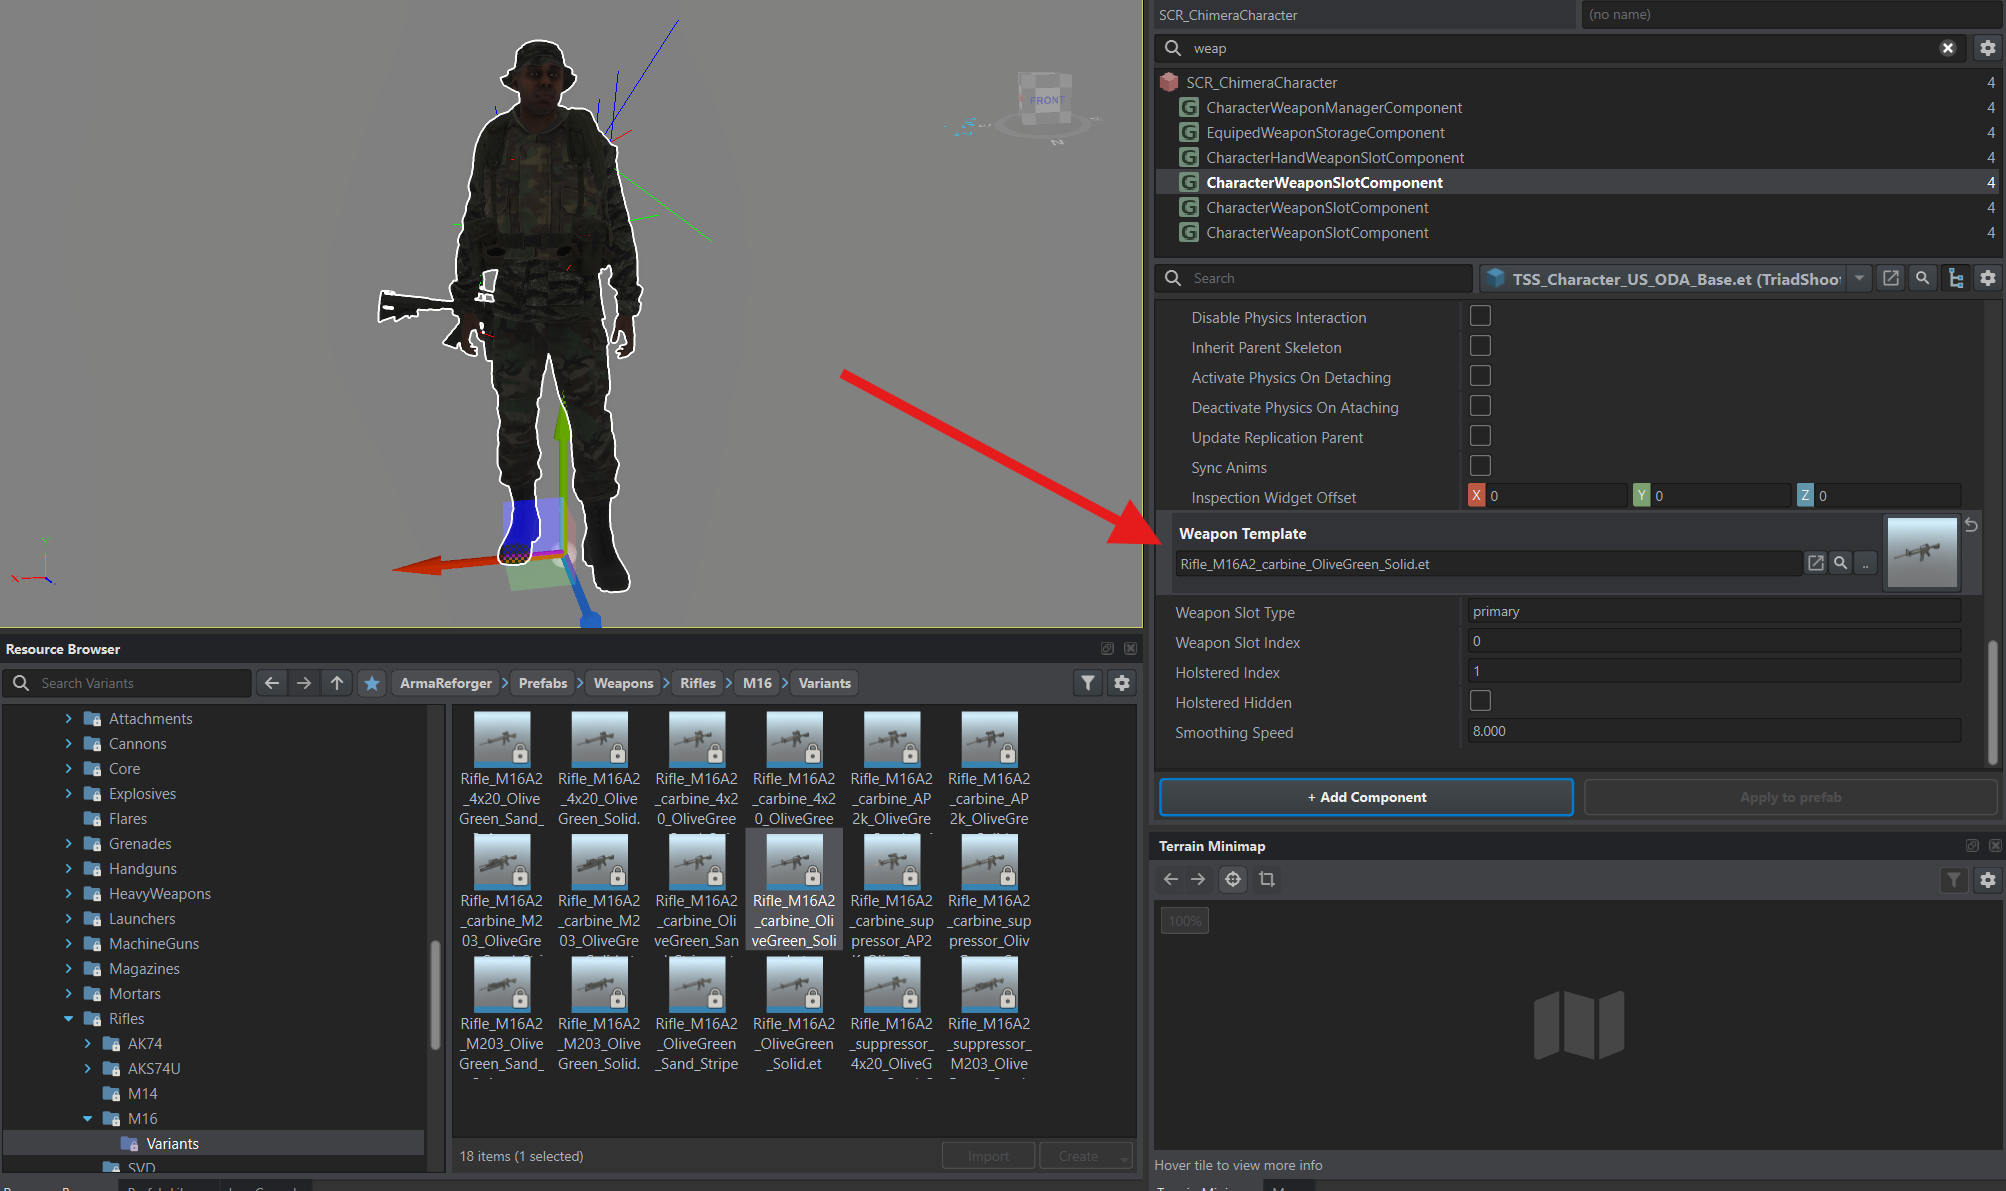
Press Ctrl+S to save the prefab.
Grenade slots
Section titled “Grenade slots”Continue editing TSS_Character_US_GB_ODA_Base.et. Type gre in the component search. Find CharacterGrenadeSlotComponent with Weapon Slot Type set to grenade and Weapon Slot Index set to 3.
In ArmaReforger, find Grenade_M67.et under Prefabs/Weapons/Grenades. Drag it into Weapon Template.
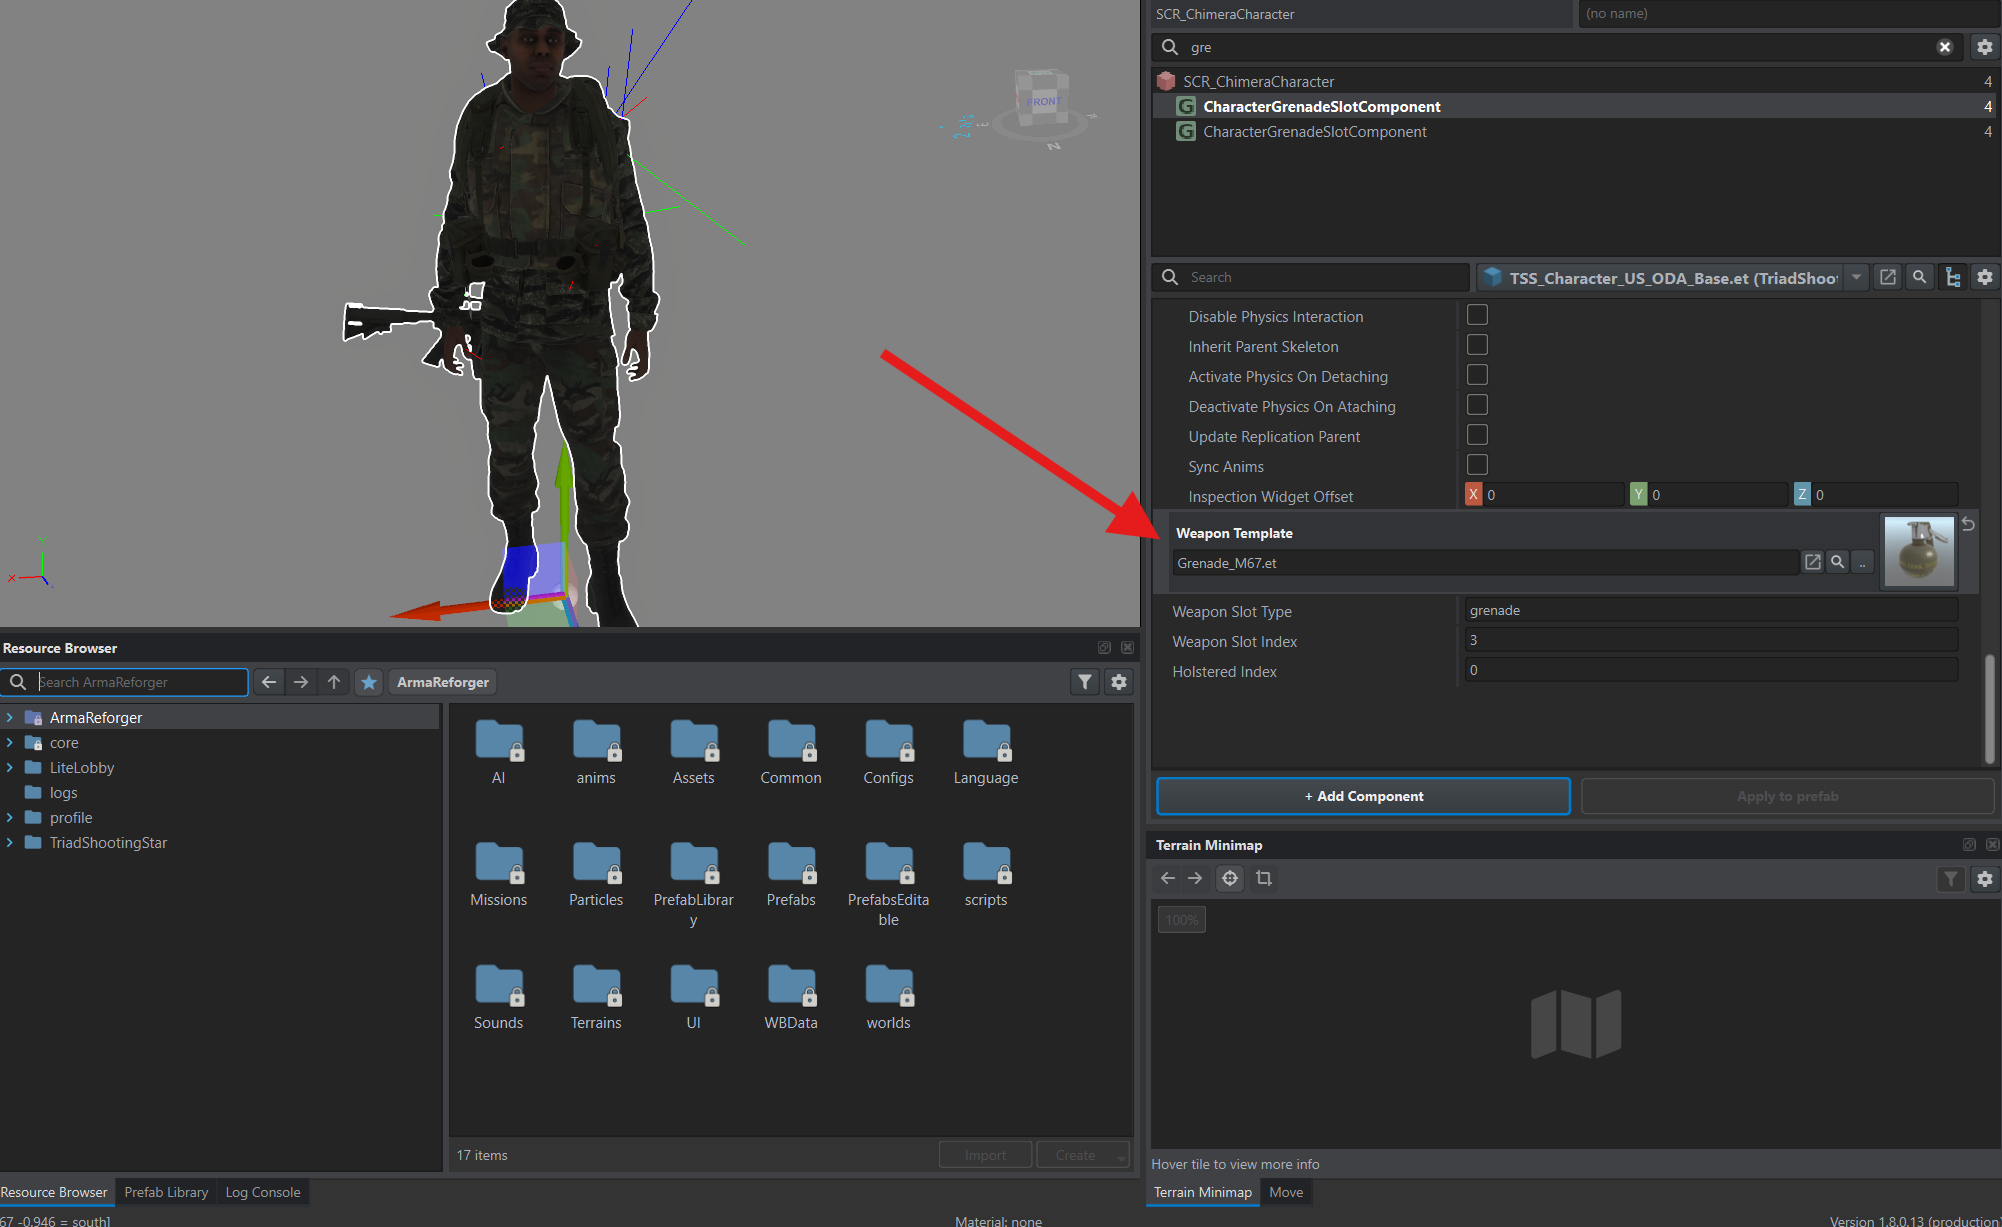
Select the second CharacterGrenadeSlotComponent, with Weapon Slot Type set to throwable. Drag Smoke_ANM8HC.et from the same folder into its Weapon Template field.
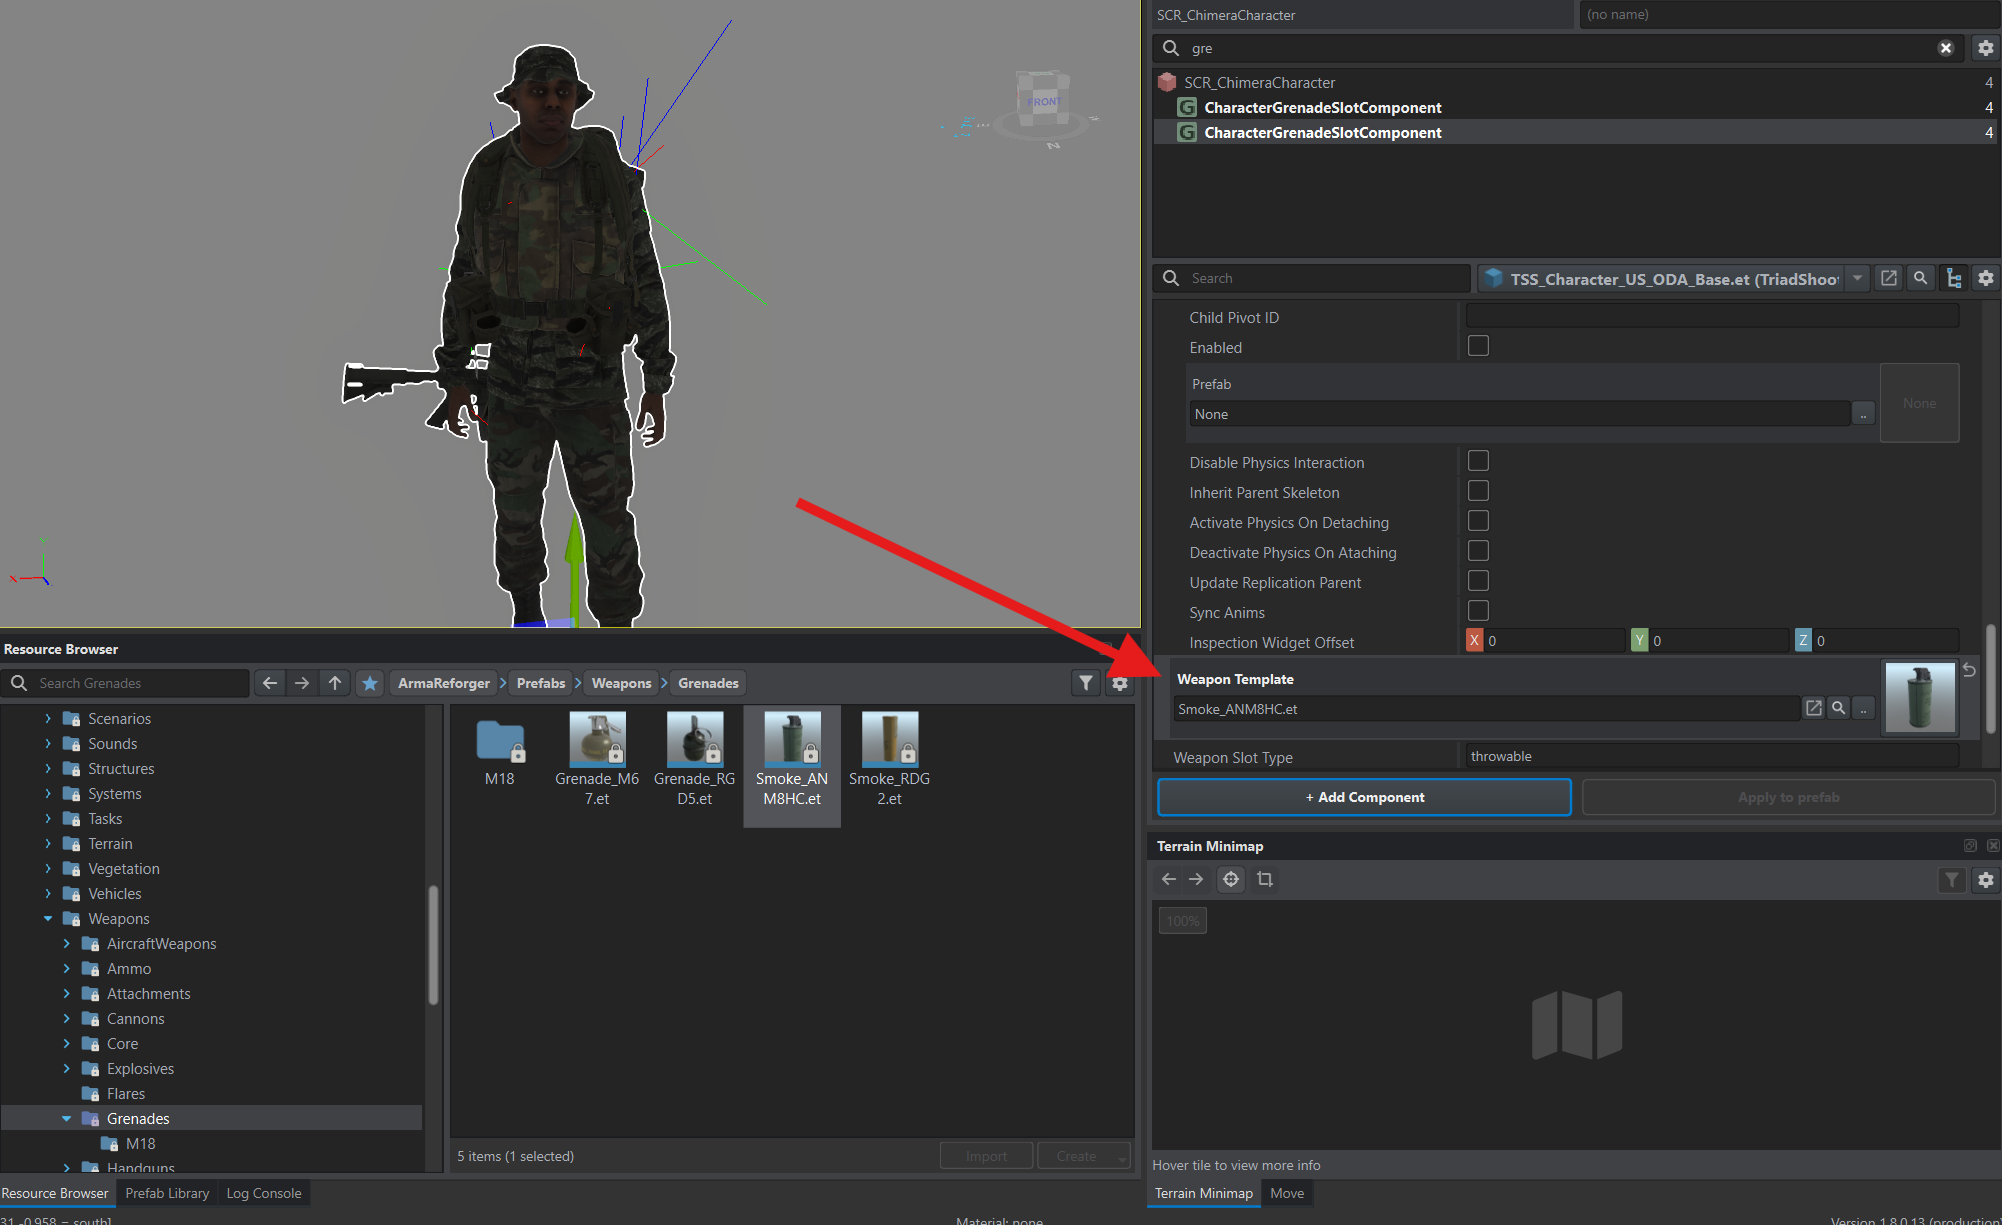
Press Ctrl+S to save the prefab.
Ammunition and pouches
Section titled “Ammunition and pouches”Continue editing TSS_Character_US_GB_ODA_Base.et: distribute ammunition and other items between its storage locations. Both child prefabs will inherit this inventory.
Select the character and find SCR_InventoryStorageManagerComponent using the component search. Expand Initial Inventory Items.
The trouser contents are already inherited from TSS_Character_US_GB_BaseLoadout.et: the radio, compass, map, and other items from the base inventory. You do not need to add them again.
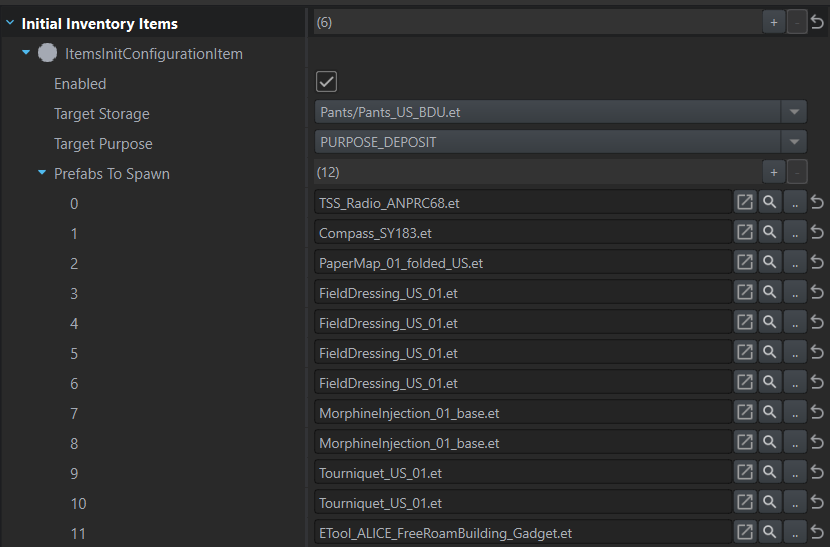
For each new storage location, click + beside Initial Inventory Items. In the new ItemsInitConfigurationItem, select Target Storage, then add Prefabs To Spawn entries with + and drag items into them from Resource Browser.
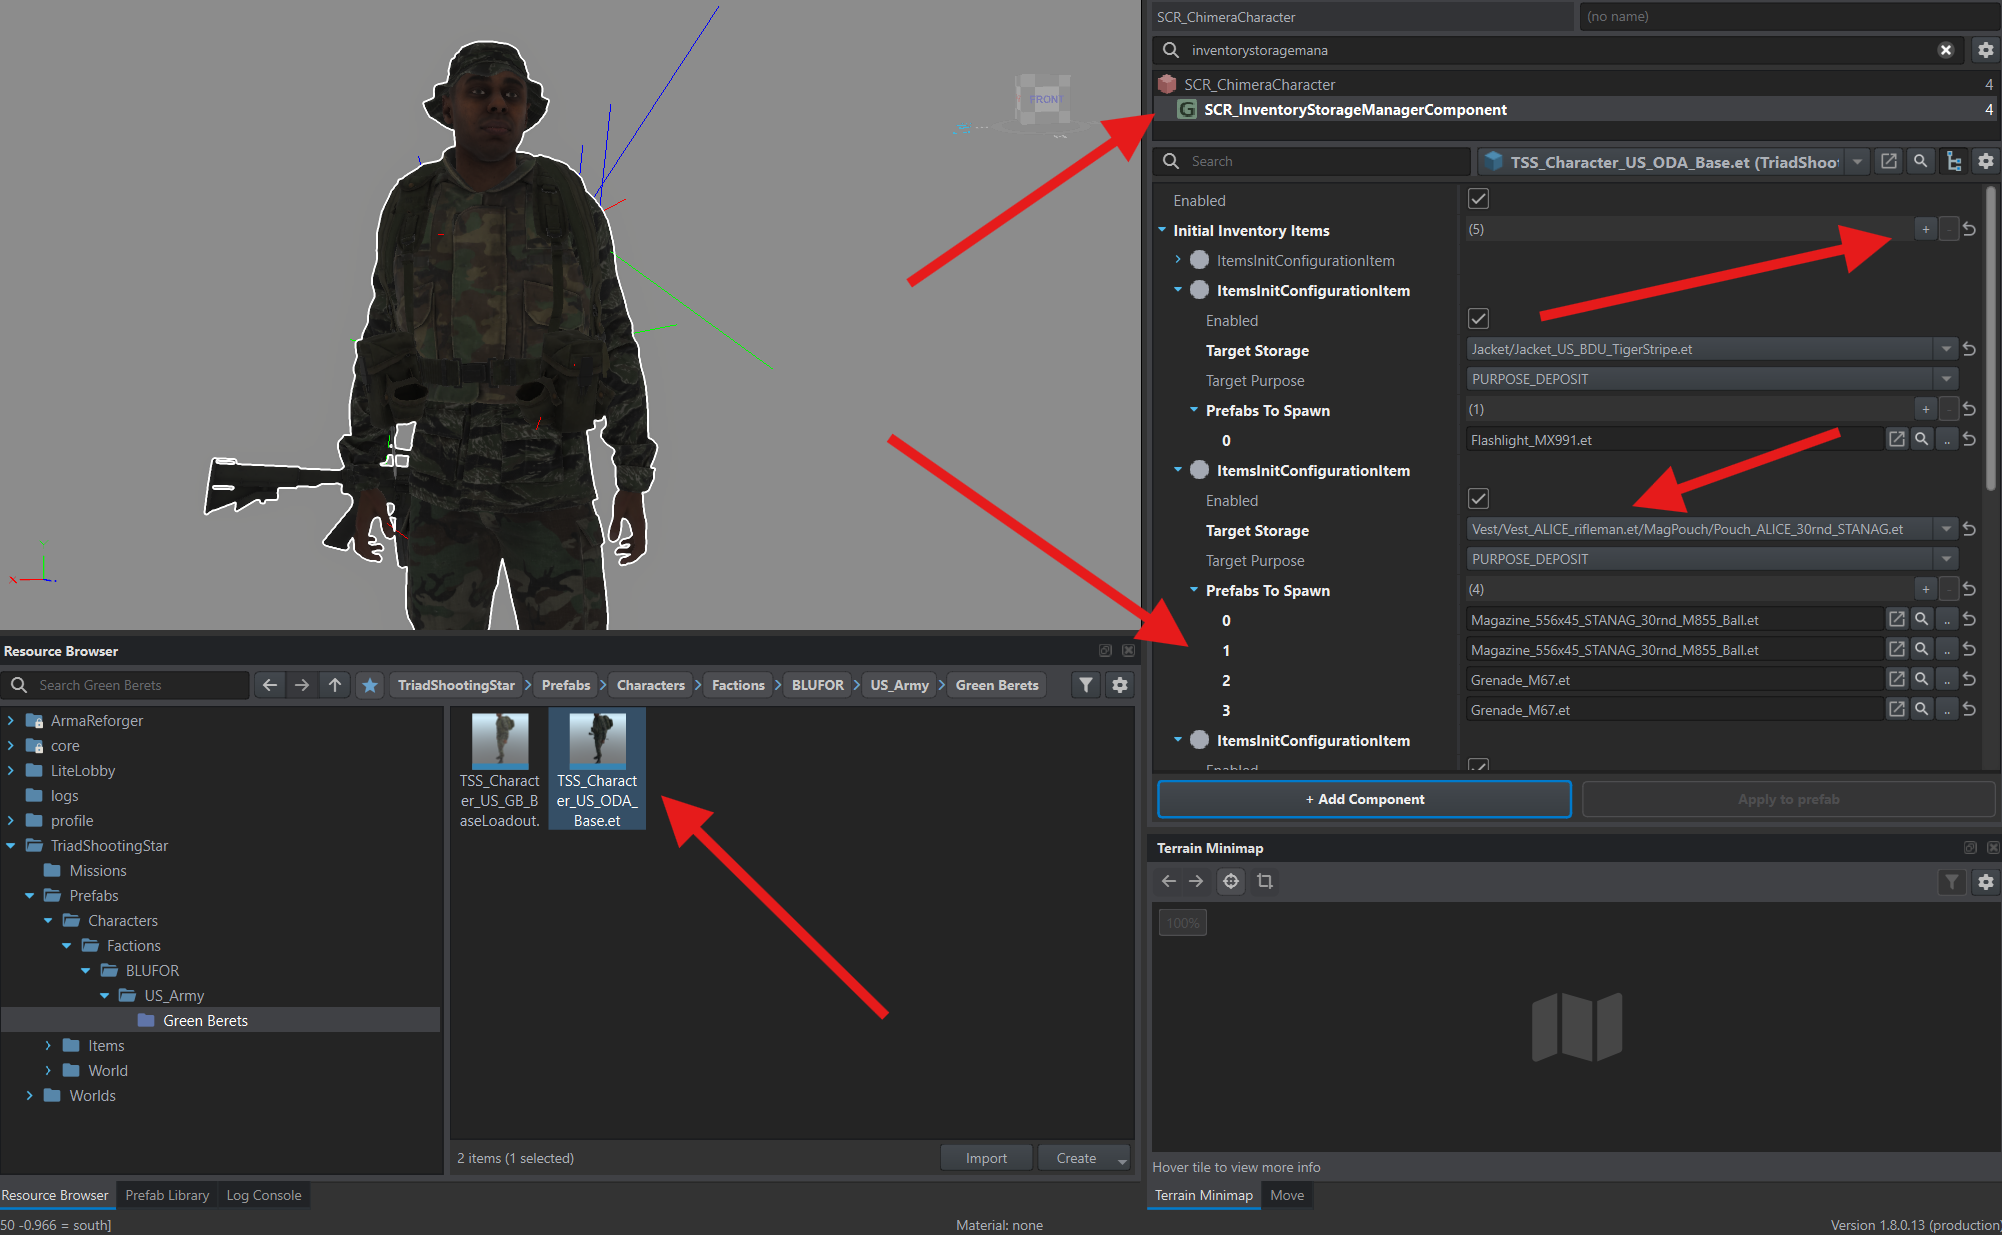
Flashlight
Section titled “Flashlight”Add an entry with Target Storage set to Jacket/Jacket_US_BDU_TigerStripe.et, the jacket pockets. Add one Prefabs To Spawn entry and assign Flashlight_MX991.et from ArmaReforger. You can find it by searching for its filename.
Magazine pouches
Section titled “Magazine pouches”Use two magazine types from Prefabs/Weapons/Magazines in ArmaReforger:
Magazine_556x45_STANAG_30rnd_M855_Ball.et— 30 standard rounds.Magazine_556x45_STANAG_30rnd_M856_Tracer.et— 30 tracer rounds.
For the first pouch, add an entry with this Target Storage:
Vest/Vest_ALICE_rifleman.et/MagPouch/Pouch_ALICE_30rnd_STANAG.et
Add four Prefabs To Spawn entries: two M855 magazines and two Grenade_M67.et grenades.
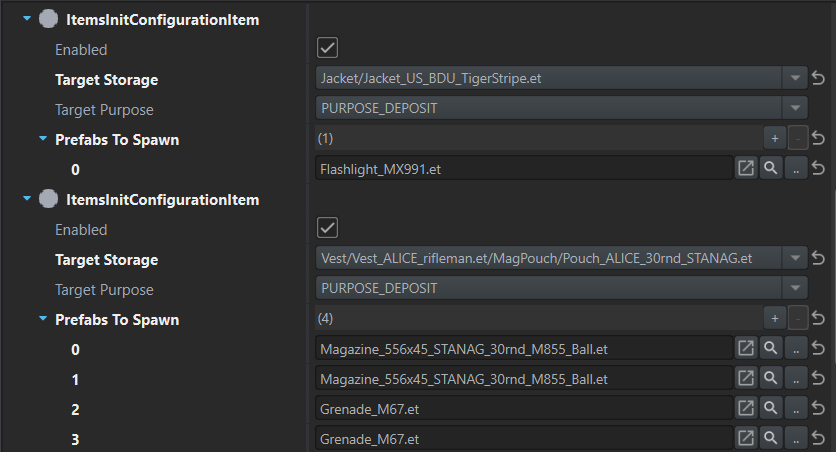
For the second pouch, add an entry with this Target Storage:
Vest/Vest_ALICE_rifleman.et/MagPouch2/Pouch_ALICE_30rnd_STANAG.et
Add two M855 magazines and two Smoke_ANM8HC.et grenades.
Reserve magazines
Section titled “Reserve magazines”For the buttpack, select this Target Storage:
Vest/Vest_ALICE_rifleman.et/Buttpack/Vest_ALICE_buttpack.et
Add three M855 magazines and one M856 tracer magazine.
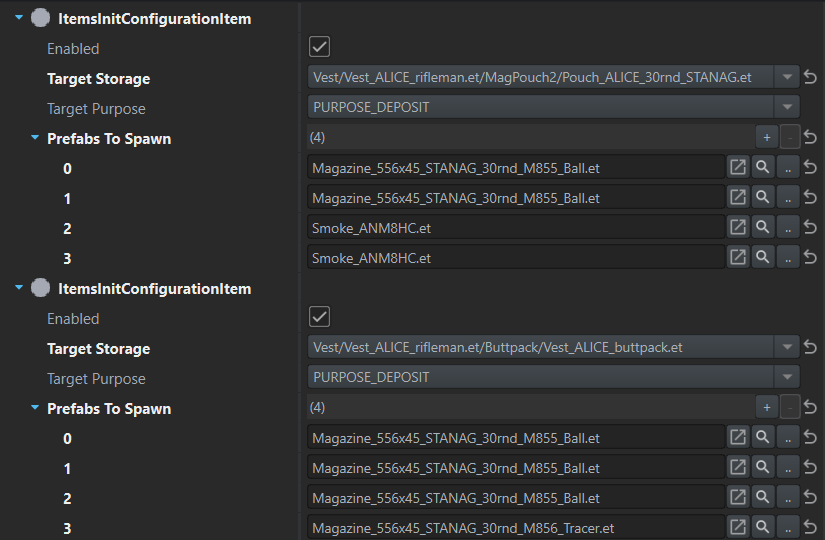
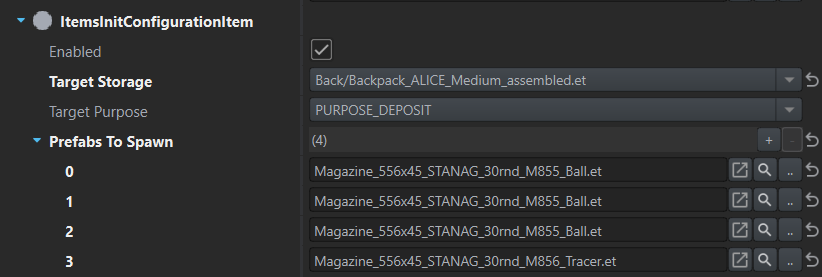
Create another entry for the backpack with this Target Storage:
Back/Backpack_ALICE_Medium_assembled.et
Add the same reserve: three M855 magazines and one M856.
Press Ctrl+S to save the prefab.
Character with a backpack radio
Section titled “Character with a backpack radio”The shared TSS_Character_US_GB_ODA_Base.et prefab is complete. Create a communications sergeant from it: replace the backpack with a radio, choose a different uniform, and update its item storage. Make these changes in the sergeant prefab so other soldiers keep the shared loadout.
In Green Berets, right-click TSS_Character_US_GB_ODA_Base.et and select Inherit. Name the new prefab TSS_Character_US_GB_CommsSergeant.
Backpack radio
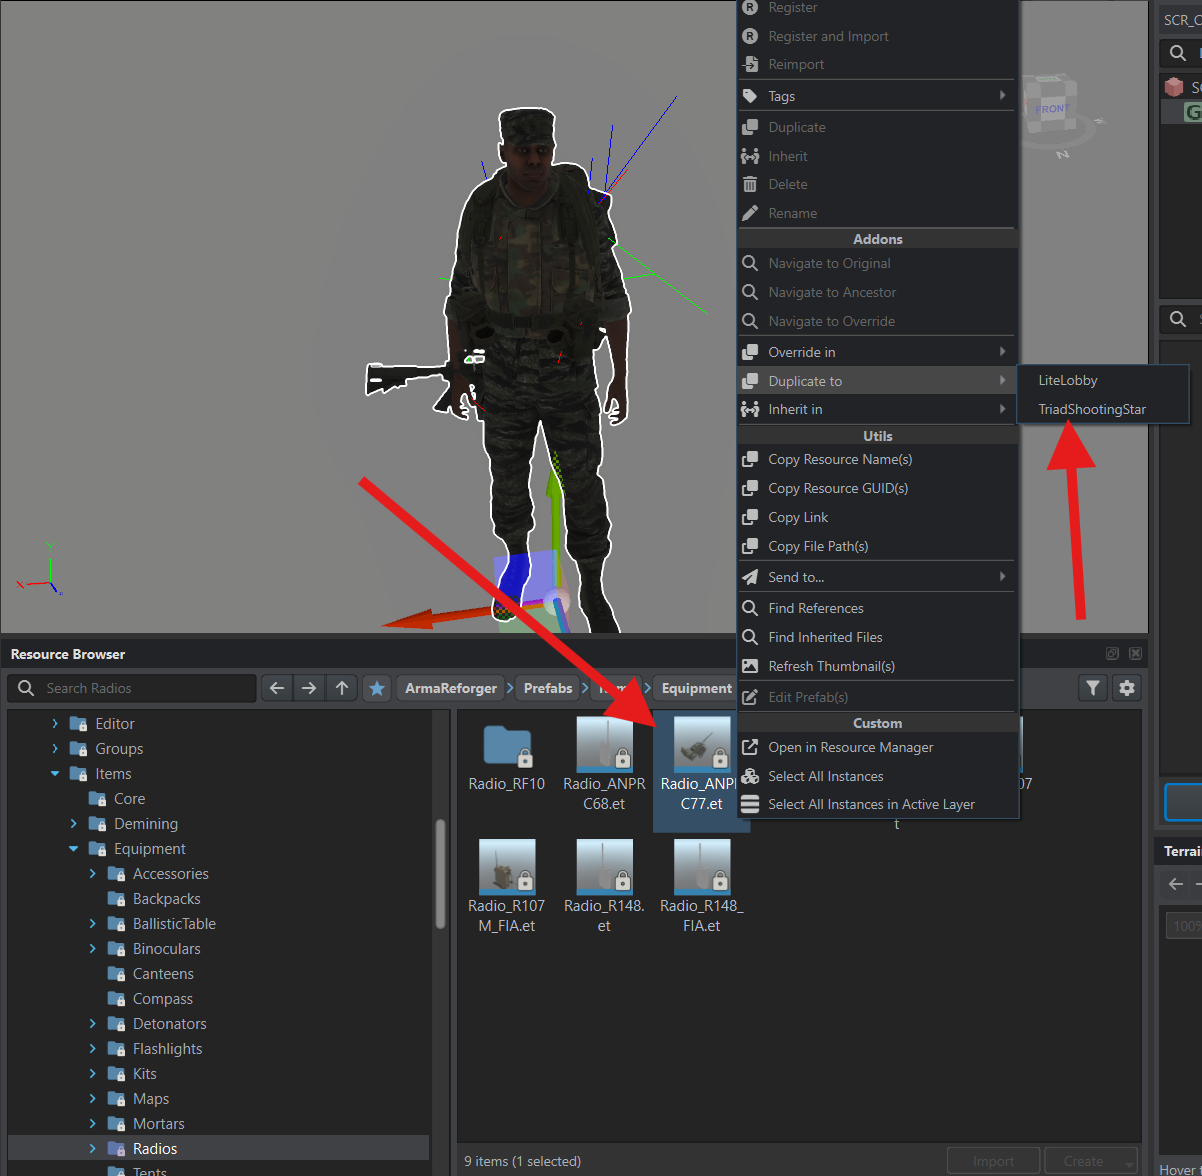
Section titled “Backpack radio”In ArmaReforger, open Prefabs/Items/Equipment/Radios. Right-click Radio_ANPRC77.et, select Duplicate to → your addon, and name it TSS_Radio_ANPRC77.
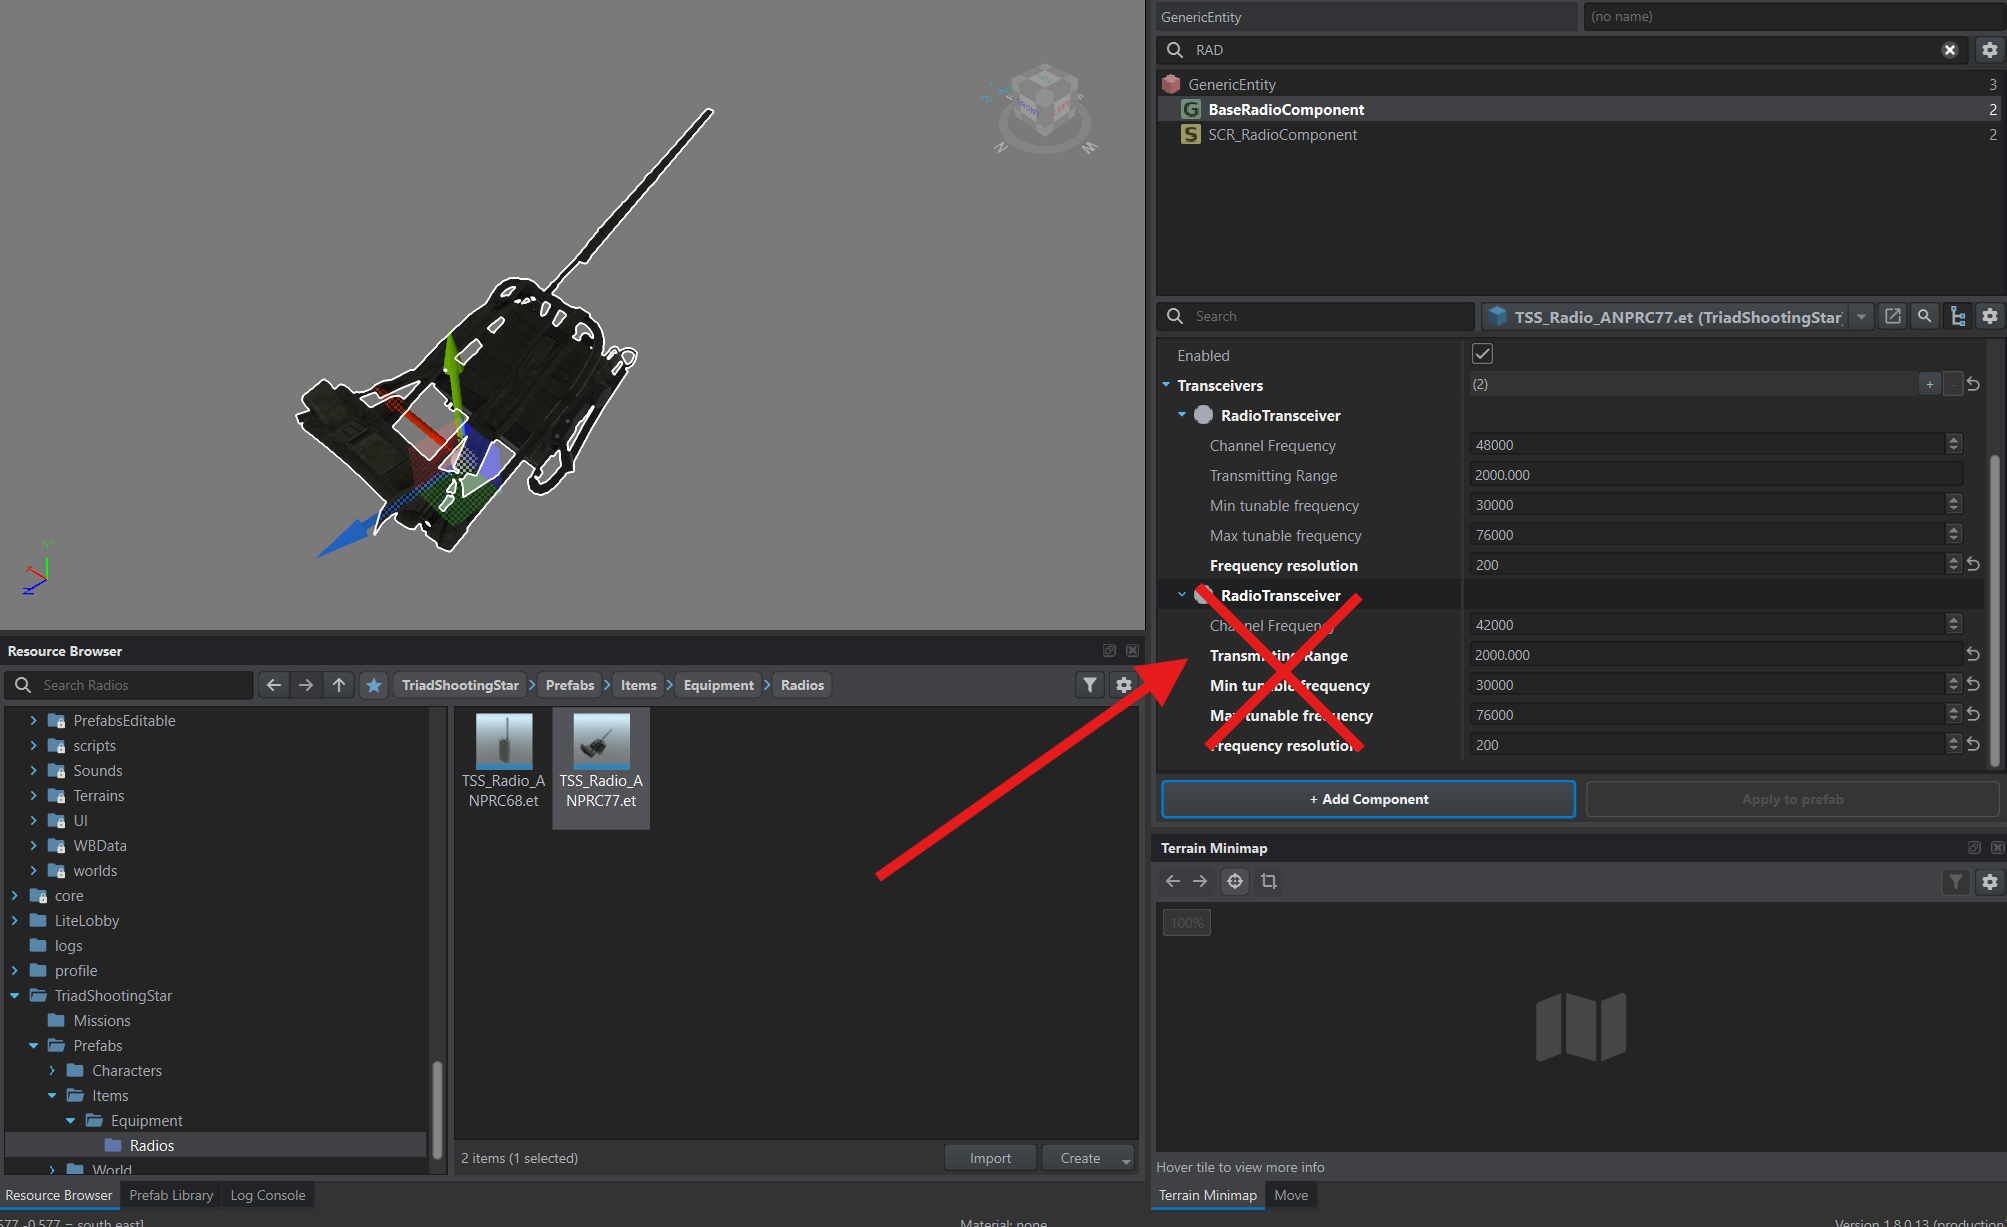
Open the new radio through Edit Prefab, select it, and find BaseRadioComponent by searching for BaseRadio. Expand Transceivers, hover over the second RadioTransceiver, and press Delete. We also keep just one channel on the backpack radio to simplify gameplay. Save the prefab with Ctrl+S.
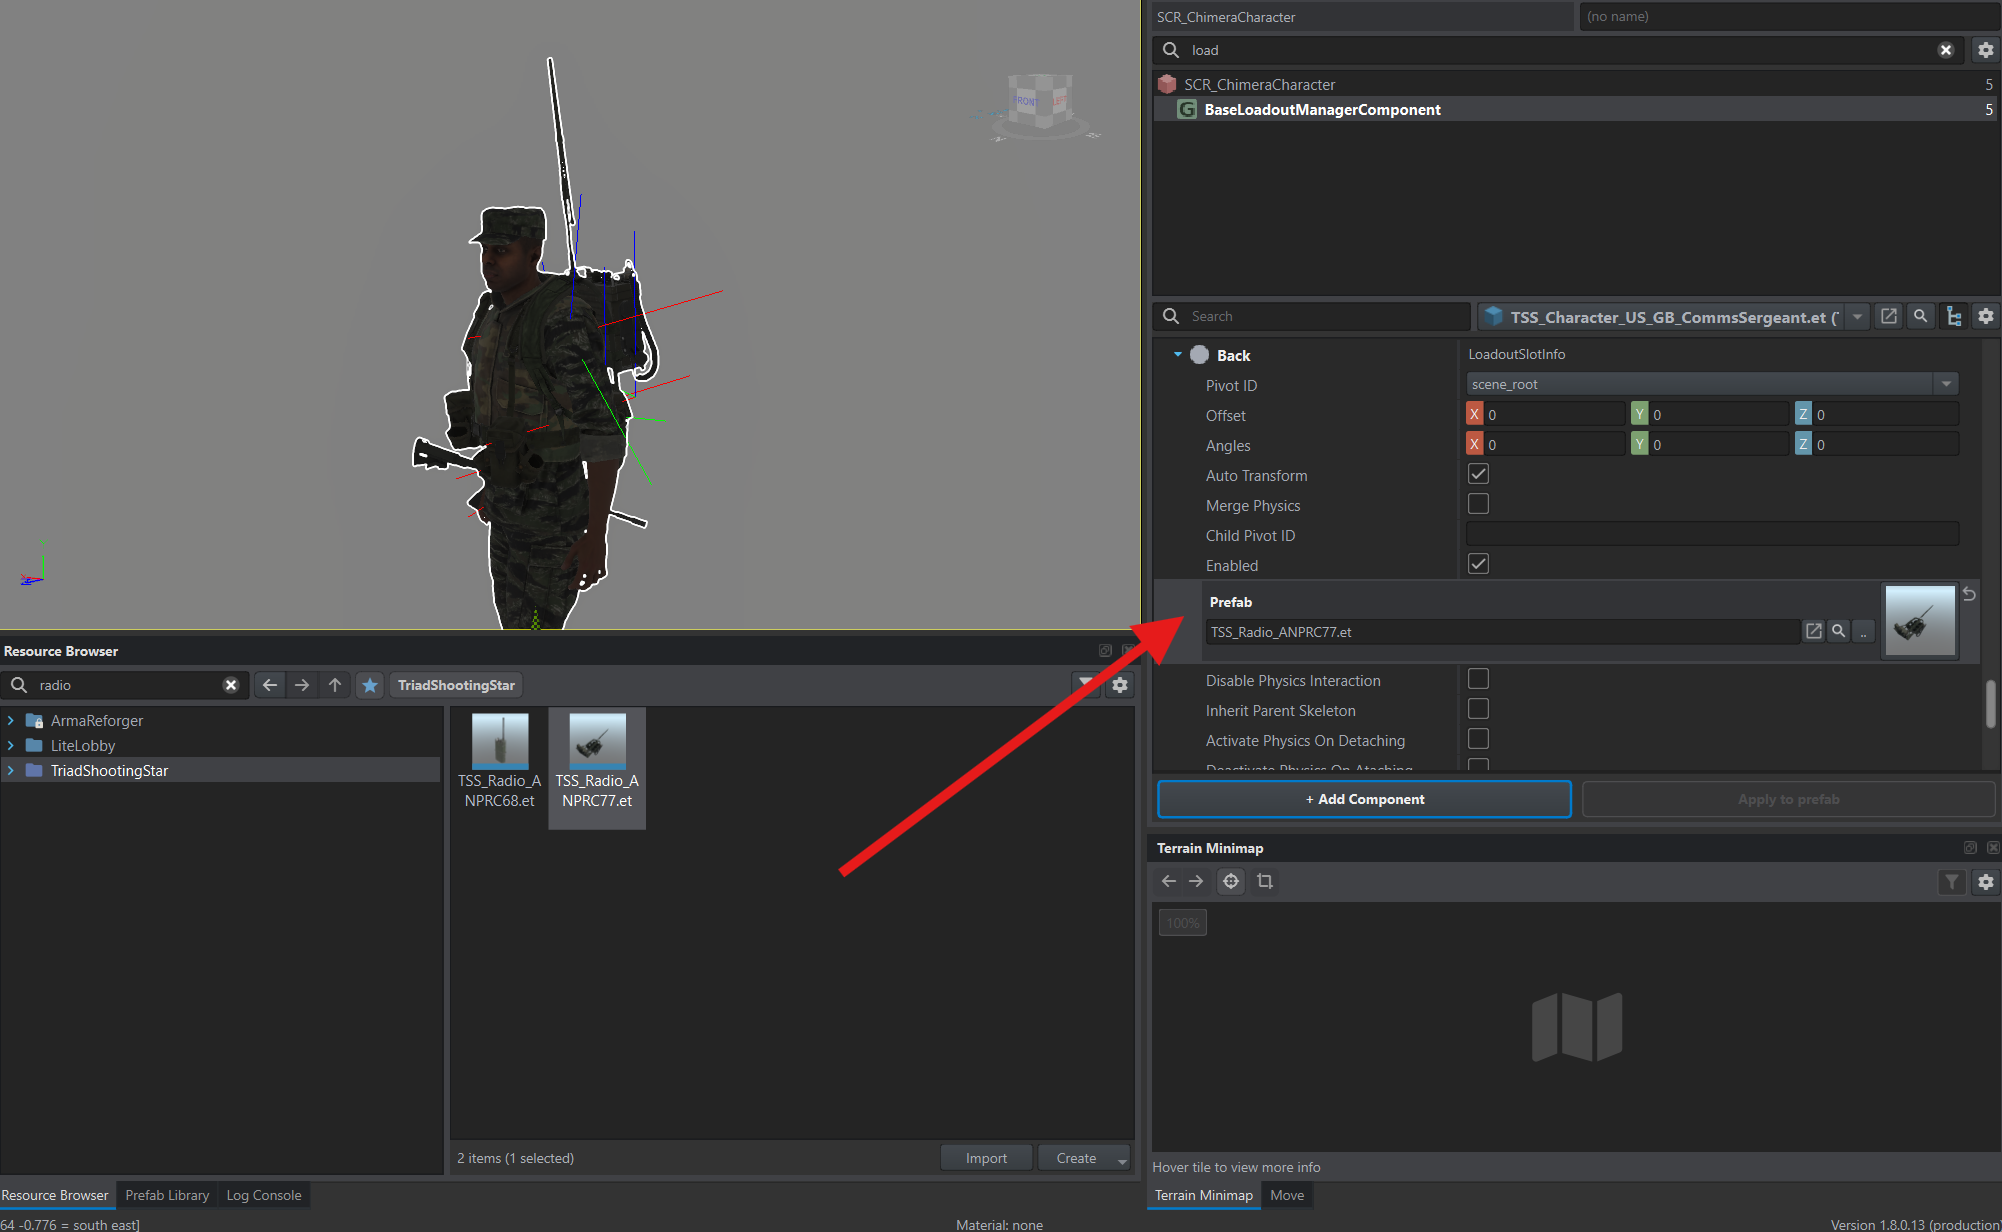
Open TSS_Character_US_GB_CommsSergeant.et through Edit Prefab. Select the character, find BaseLoadoutManagerComponent, and expand Slots → Back. Drag TSS_Radio_ANPRC77.et from your addon into Prefab. The radio replaces the backpack.
The sergeant’s uniform
Section titled “The sergeant’s uniform”You can also change an individual character’s uniform. The screenshots use a patrol cap, rolled-sleeve jacket, and Tiger Stripe trousers. Under BaseLoadoutManagerComponent → Slots, assign these Prefab values:
- Hat —
Hat_Patrol_US_01_TigerStripe.et. - Jacket —
Jacket_US_BDU_rolledup_TigerStripe.et. - Pants —
Pants_US_BDU_TigerStripe.et.
Find all three files by searching in ArmaReforger.
Inventory after replacing equipment
Section titled “Inventory after replacing equipment”After replacing clothing, update where its items are stored. Under SCR_InventoryStorageManagerComponent → Initial Inventory Items, open the trouser inventory entry and select Pants/Pants_US_BDU_TigerStripe.et in Target Storage.
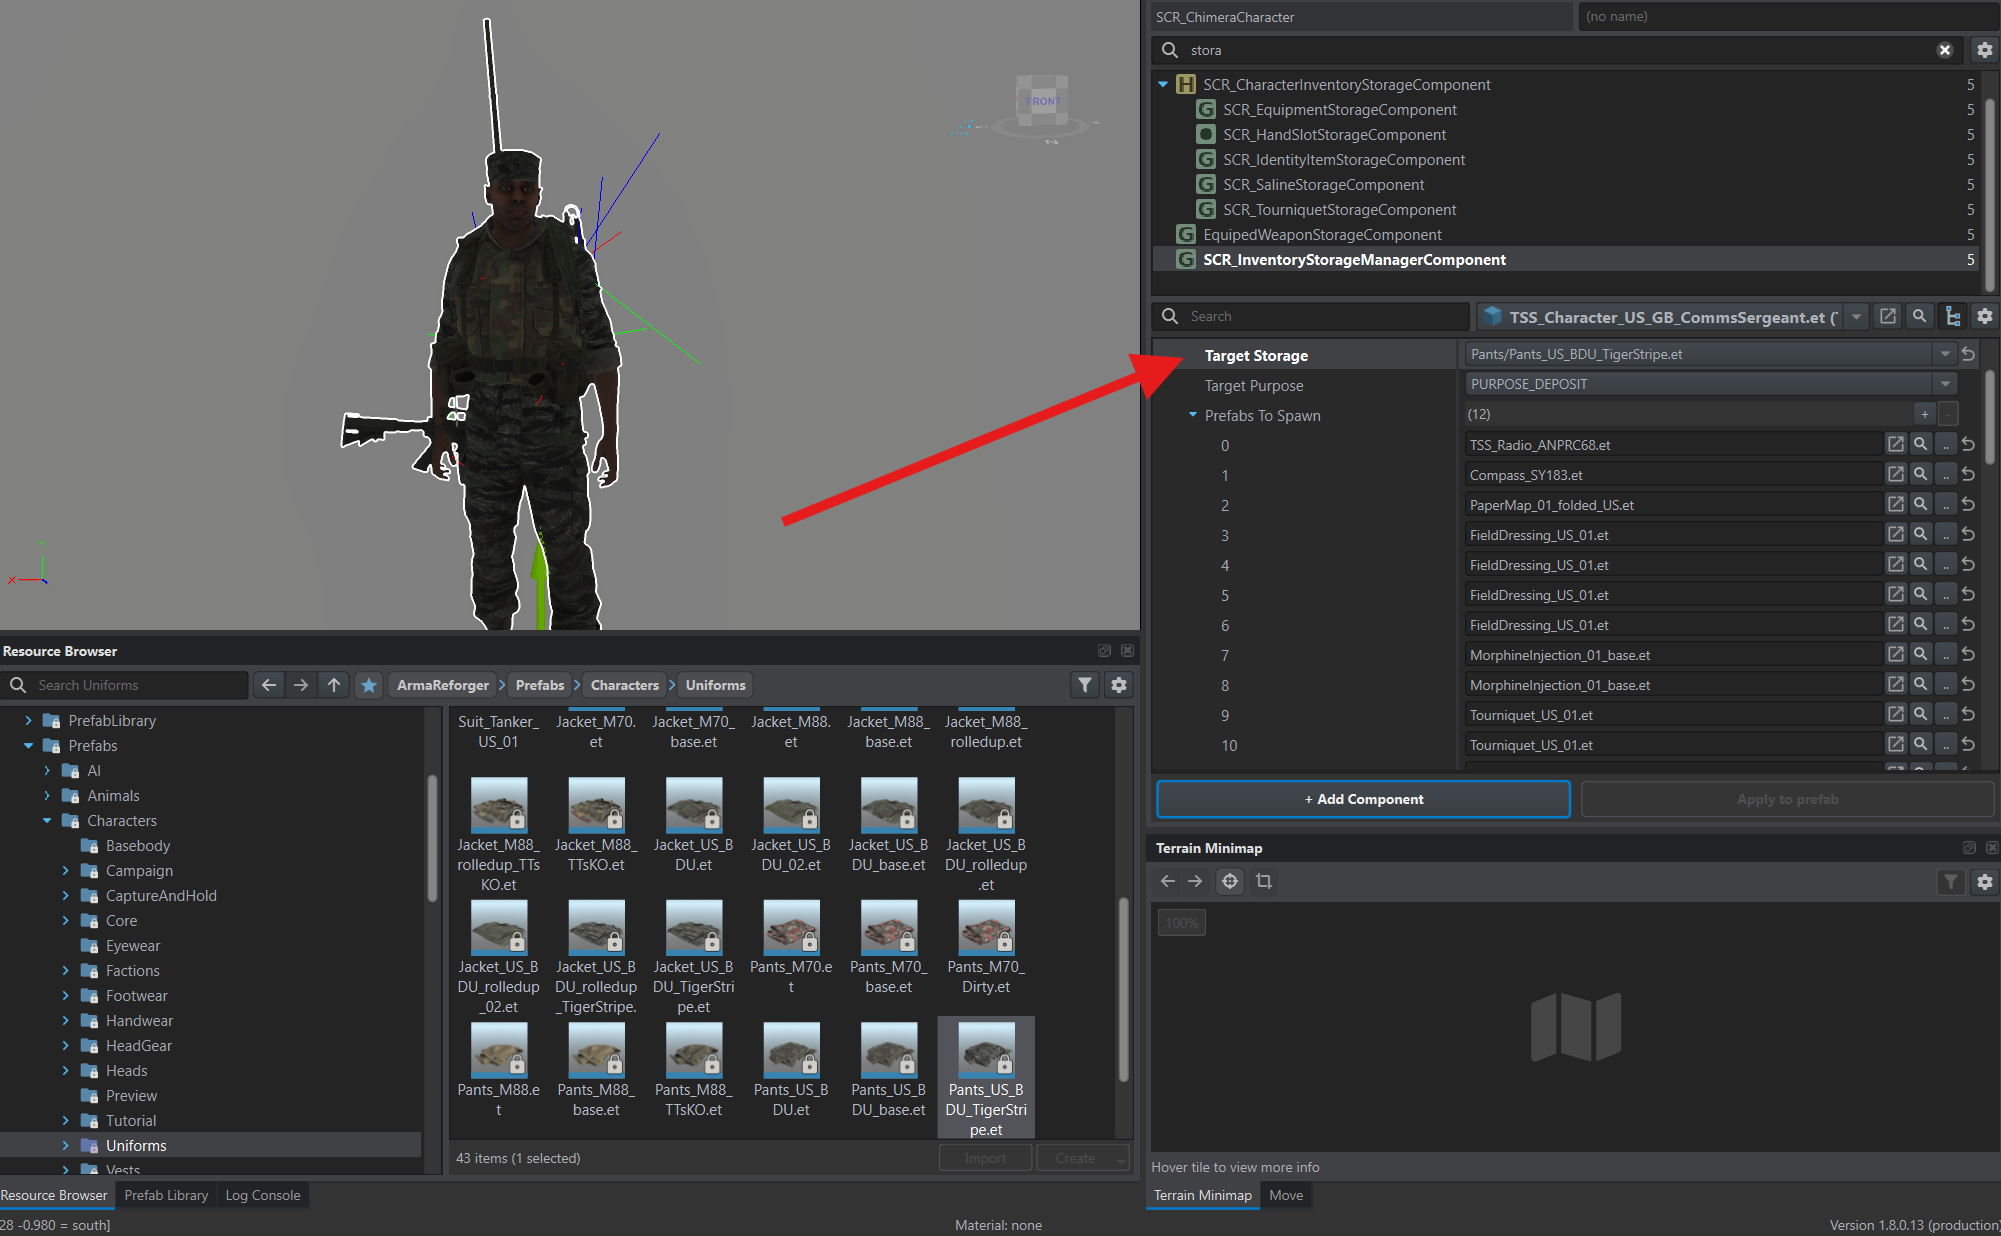
Also update the flashlight entry’s Target Storage to Jacket/Jacket_US_BDU_rolledup_TigerStripe.et.
The radio has replaced the backpack, so remove the magazines intended for it. Find the entry with Target Storage set to Back/Backpack_ALICE_Medium_assembled.et. In its Prefabs To Spawn list, hover over each entry and press Delete until the list is empty.
Press Ctrl+S to save the sergeant prefab.
Character with additional weapons
Section titled “Character with additional weapons”For the commander, return to TSS_Character_US_GB_ODA_Base.et and its shared loadout. Create another child and add an M72A3 launcher and M22 binoculars.
In the Green Berets folder, right-click TSS_Character_US_GB_ODA_Base.et and select Inherit.
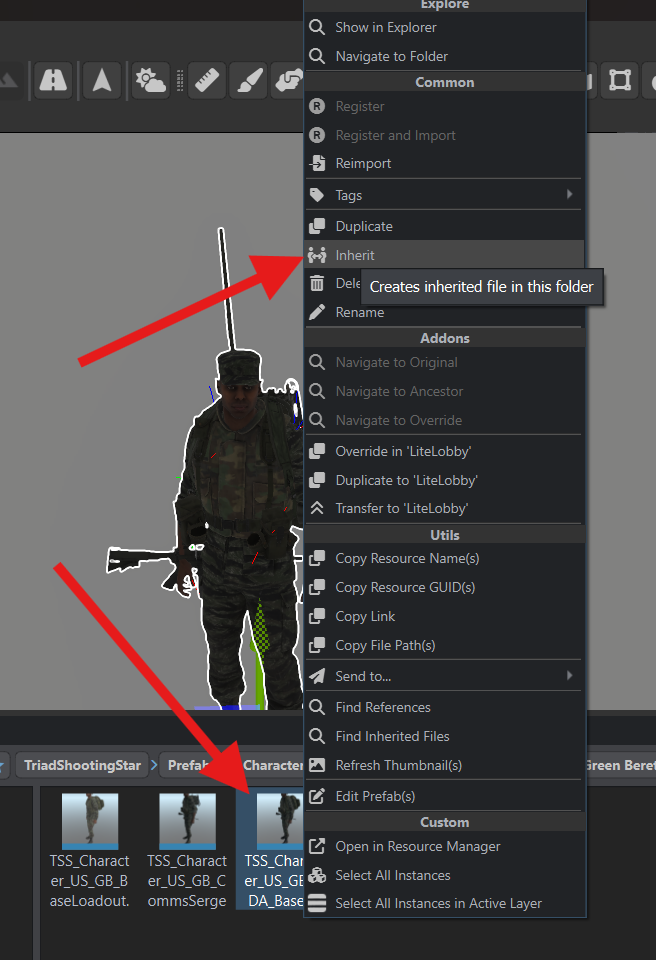
Name the prefab TSS_Character_US_GB_DetachmentCommander and click OK.
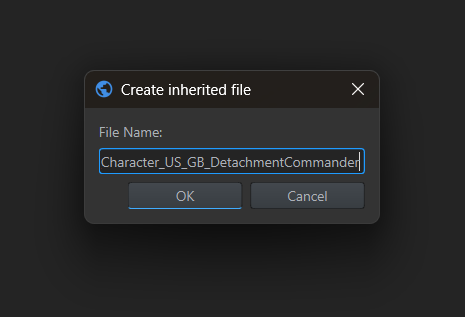
Open the new prefab with Edit Prefab and select the character.
Launcher
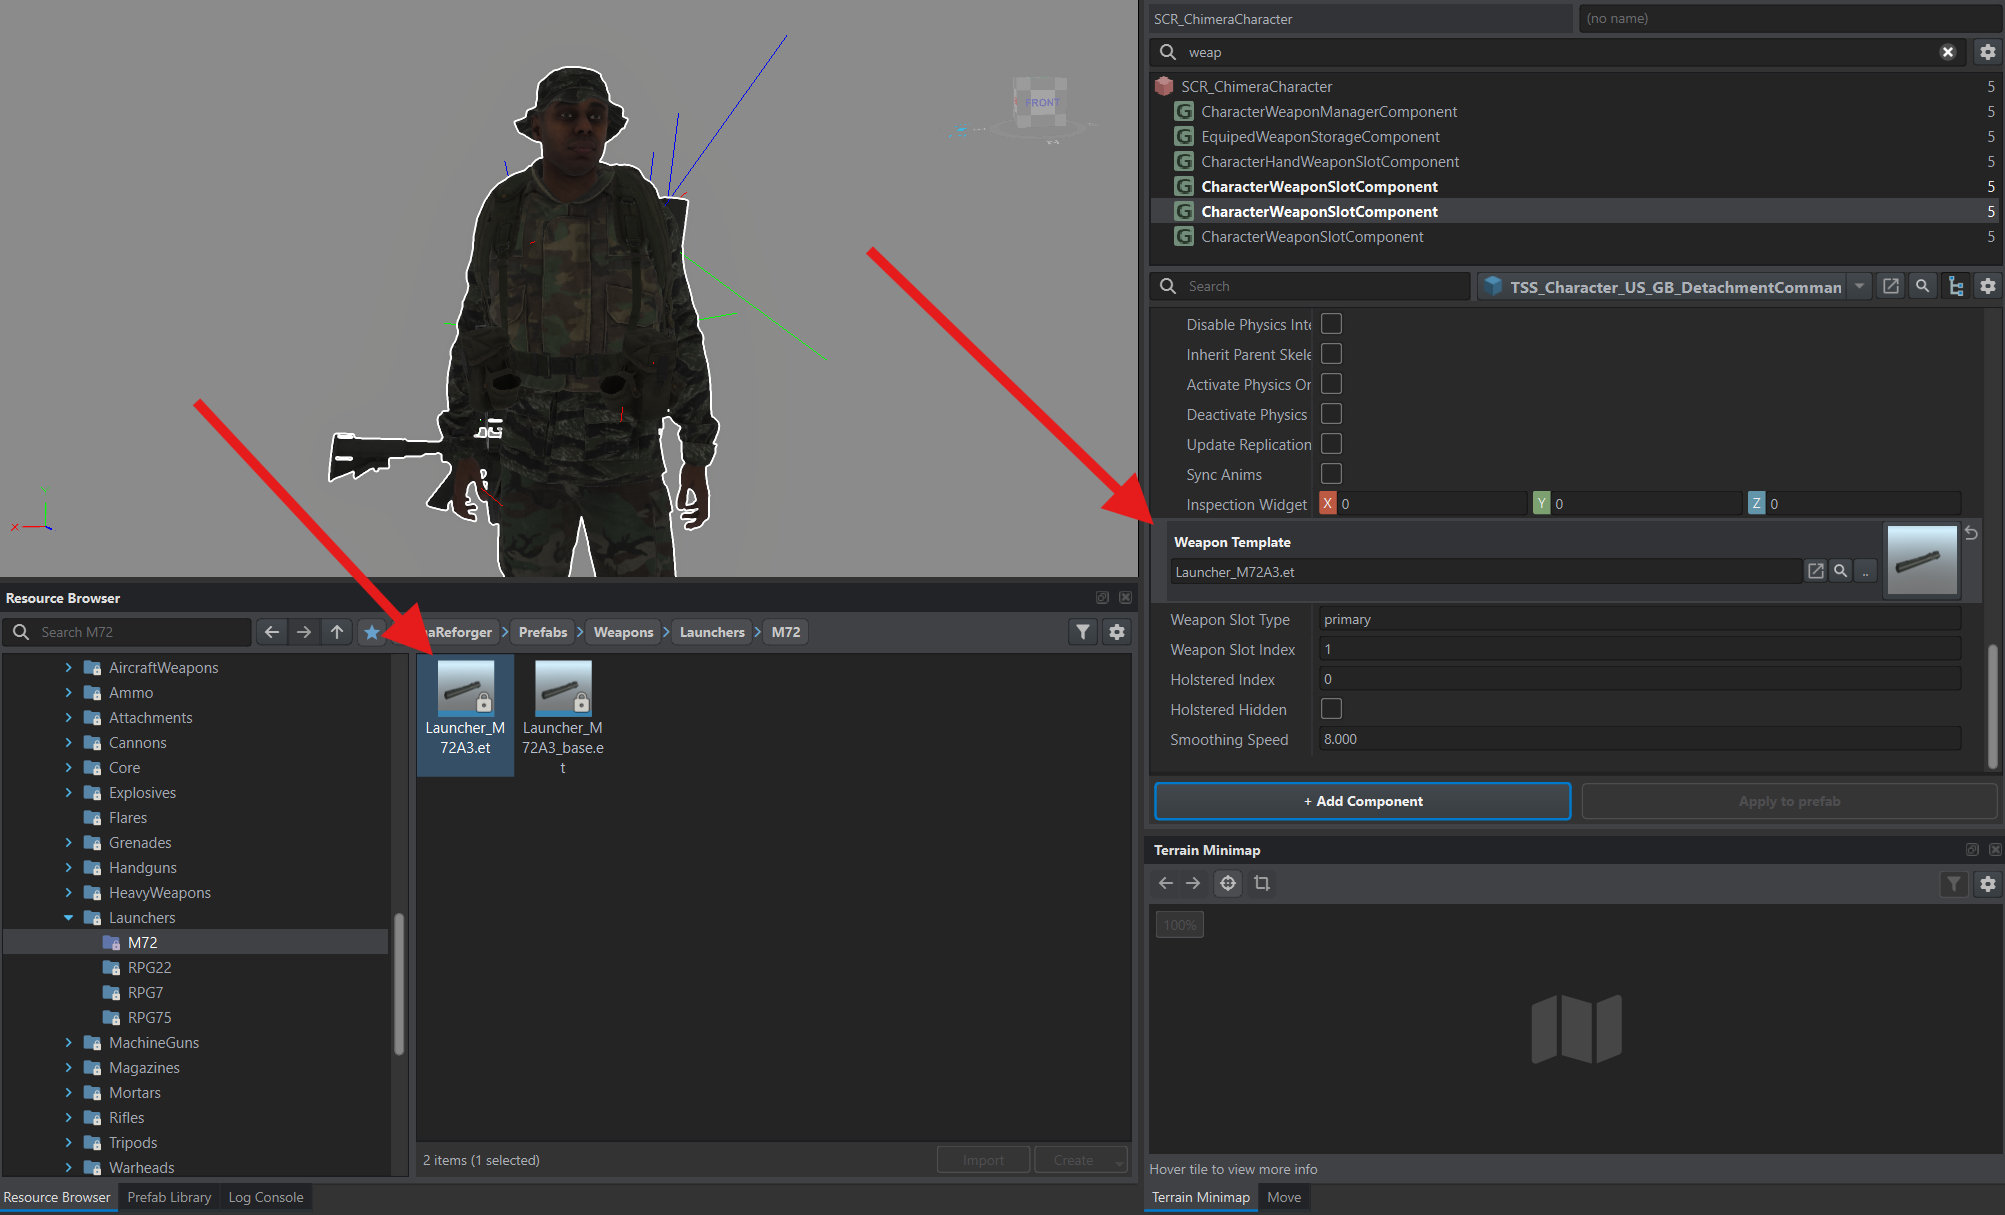
Section titled “Launcher”Enter weap in the component search. Find the CharacterWeaponSlotComponent with Weapon Slot Type set to primary and Weapon Slot Index set to 1. This is the second primary weapon slot; slot 0 already holds the carbine.
In the ArmaReforger project, open Prefabs/Weapons/Launchers/M72 and drag Launcher_M72A3.et into Weapon Template.
Binoculars
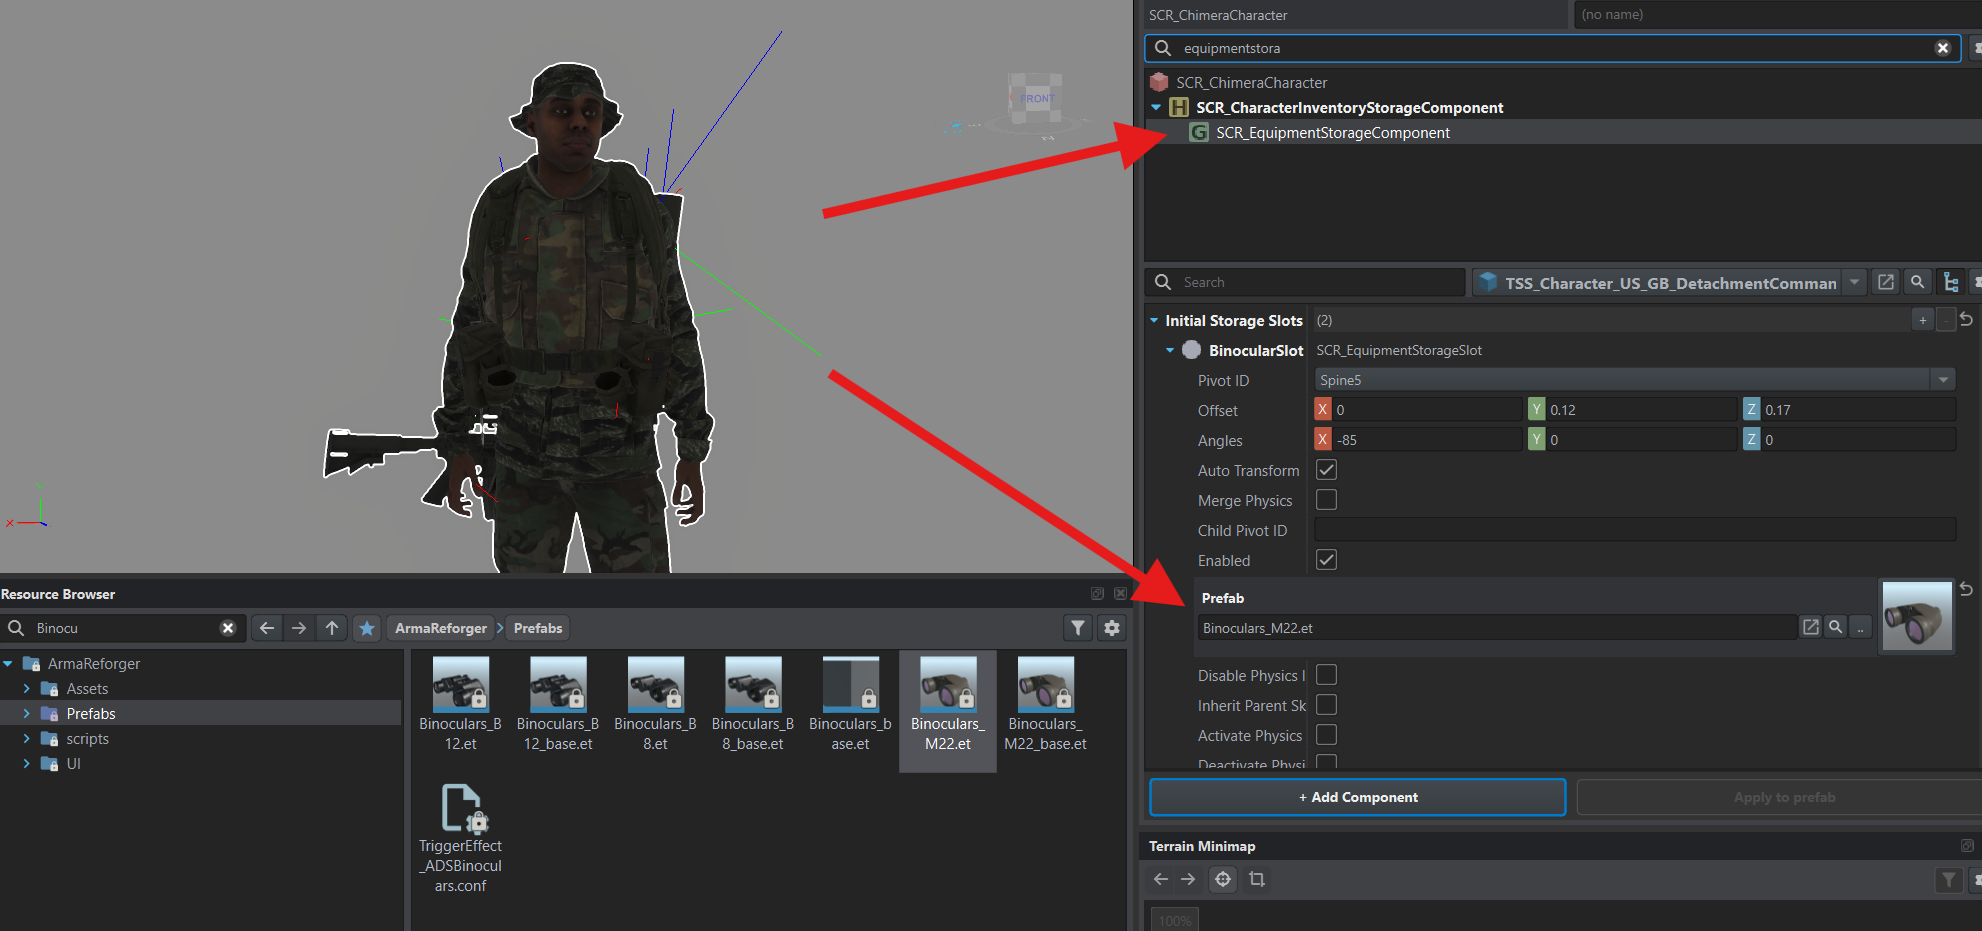
Section titled “Binoculars”Expand SCR_CharacterInventoryStorageComponent and select its nested SCR_EquipmentStorageComponent. In its properties, expand Initial Storage Slots → BinocularSlot.
Search for Binoculars_M22.et in the ArmaReforger project and drag it into this slot’s Prefab field.
Press Ctrl+S to save the commander prefab. Both characters’ equipment is ready. In the next chapter, set their names and roles, add them to Game Master, and check them in game.